8. Desktop Automation
Jiffy UI automation framework allows user to automate user interface pages for any application. Consider a scenario of automating notepad which is a desktop application.
UI automation is a 2 step process:
- Step1: Familiarizing the elements to be automated.
- Step2: Designing task using the familiarized elements.
Step1: Familiarizing the elements to be automated Jiffy Familiarization application is a desktop client that enables users to familiarize the UI objects of an application. Once familiarized, the UI objects are saved in repository and can then be used in task design steps. As part of familiarization, Jiffy captures required information about the UI object and allows user to modify the properties. Object familiarization is a one time activity. Saving these objects to server allows the users to use for respective automation scenarios. These familiarized controls are saved in Jiffy under Repository > UI controls. Below video demonstrates the process of familiarization for Desktop application.
Step2: Designing task using the familiarized elements The controls have already been familiarized using JiffyUILearn application and using these controls we design the task. Below video demonstrates how to perform a task using the Desktop UI node.
Note: Desktop automation is possible for only those applications that have an .exe file.
Table Familiarization
The table rows that are visible during familiarization are only captured by UI Learn. The user must manually scroll down/up to capture the entire data in a table.- Create an application (desktop) in UI Learn. For more details, click here.
- Familiarize the data in any table in a desktop application, the
following dialog box is displayed:
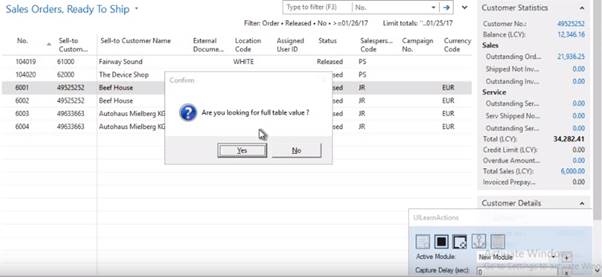
- When the user clicks the Yes button, the whole data of the table is captured.
- When the user clicks the No button, then only a particular cell data is captured (the cell that is selected).
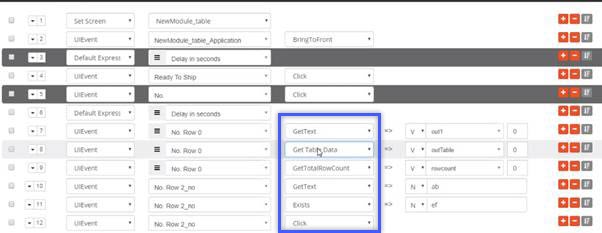
- The user can perform actions on the captured data from the Task
Design screen -> Edit UI window. The available actions for
the UI event depend upon the type of control.
Keyboard: Use this option when any key must be pressed from the keyboard, for example: Enter key.
Click: When the required UI action to be performed is a “click on the UI control”, then select this option.
DoubleClick: When the required UI action to be performed is a “double-click on the UI control”.
Virtual Click: The Virtual Click action feature enables the users to scroll a web page to view and click an element that is not visible in the current screen layout.
Input: When any input must be provided for the familiarized field like a text value.
Check: When select action must be performed on the checkbox.
Uncheck: When clear action must be performed on the checkbox.
Checked: Returns true or false based on whether the checkbox is selected or not.
Clear: To clear the provided input.
Click by Offset: As the click action is performed on the mid-point of the screen, the Click by Offset option allows the user to perform click action at the desired position of the screen by specifying a value. Example:
- -200: Moves the cursor from the mid-point of the screen to the left side by 200 px.
- +200: Moves the cursor from the mid-point of the screen to the right side by 200 px.
GetText: Used to get the text value of any UI event.
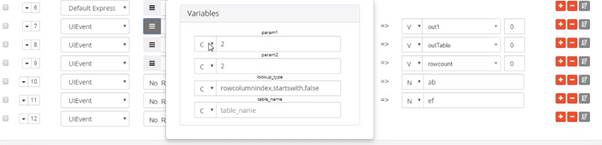
Type the following details:
- Param1: Type the row number.
- Param2: Type the column number.
- Lookup_type: The lookup type is of the format, “rowcolumnindex,startswith,false”
- Table_name: This is a mandatory field. Type the table name that is specified in Table def. -> Edit Table Definition dialog box.
Get Table Data: Used to get the entire table data in the specified Output table.
Type the following details:
- Param1: Not required.
- Param2: Not required.
- Lookup_type: Not required.
- Table_name: Type the table name that is specified in
the Table def. -> Edit Table Definition dialog box.
Get Total Row Count: To get the total number of rows in the familiarized table.
- Param1: Not required.
- Param2: Not required.
- Lookup_type: Not required.
- Table_name: Type the table name that is specified in the Table def. -> Edit Table Definition dialog box.
Error Scenarios:
When multiple controls are having the same Xpath, then the following
message is displayed in the Step Data tab of the Result of
execution dialog box.
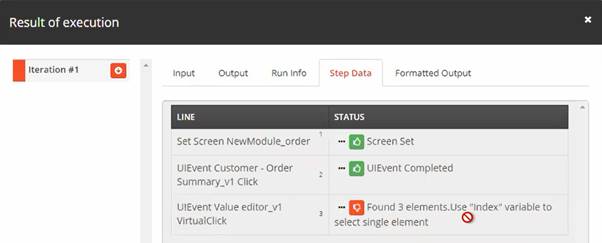
Solution: Add an index to the specific UI control in the UI Control data screen.
Do the following to add index:
Go to Repository -> UI Controls.
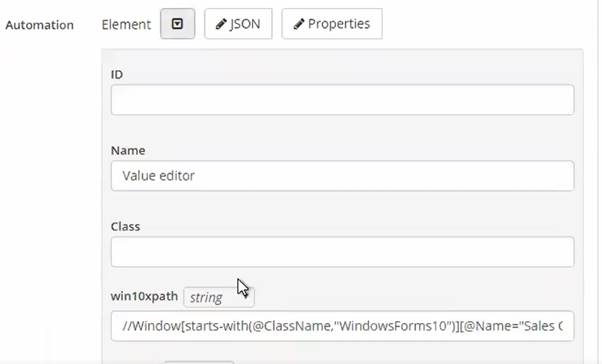
Go to the UI Control data screen of the specific UI control.
Click on the Edit button.
Click on the Properties field.
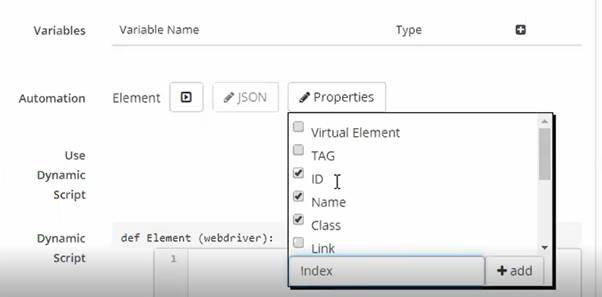
Type Index and then click on the Add button.
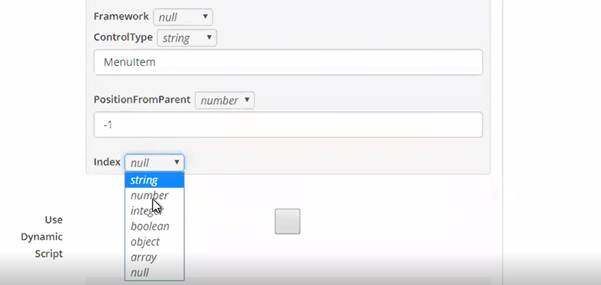
Click on the Element field.
Select the index type as an integer.
Click on the Save button.