10. Export/Import of Tasks
In Jiffy, tasks can be moved from one Release to another Release.
During Import flow users has a option to choose between existing or new entities.
Note: Whenever Export / Import functionality is used for any of the tasks, Username / Passwords Parameters stored in the tasks will NOT BE imported and users needs to re-configure after the import.
Movement of Tasks is achievable across different Jiffy servers. For Example , Tasks developed in Development servers exported and imported to QA server . Similarly QA Server to PROD Servers.
- Jiffy Import Export
1.1 New Process Deployment
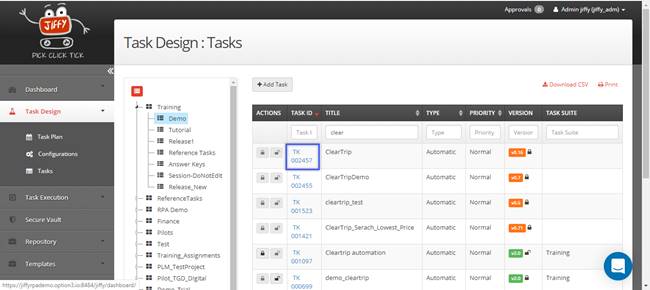
The steps below should be followed when a new process is moved from the Development server to the Stage / PROD server.- Navigate to Task Design -> Tasks.
- Under the respective release, click on the Task ID of the task which needs to be exported.
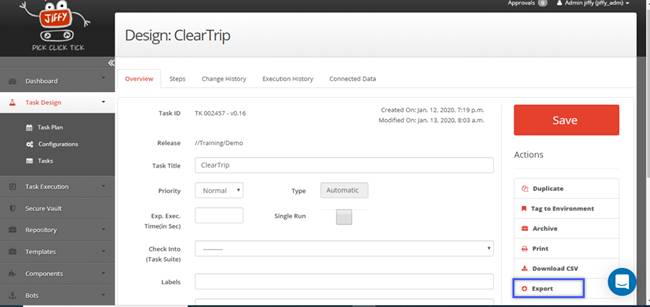
- In the Overview tab of the Design page, click on the
Export button.
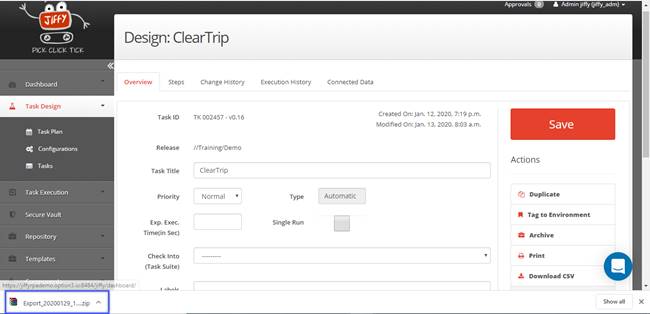
- The export zip file will be downloaded.
- Go to the Jiffy environment where the task needs to be imported to (eg: Staging / PROD environment)
- Navigate to Task Design -> Tasks.
- Select the release where the task must be imported.
Note: Create the project and release, in case it is not already created. For more information, click here.
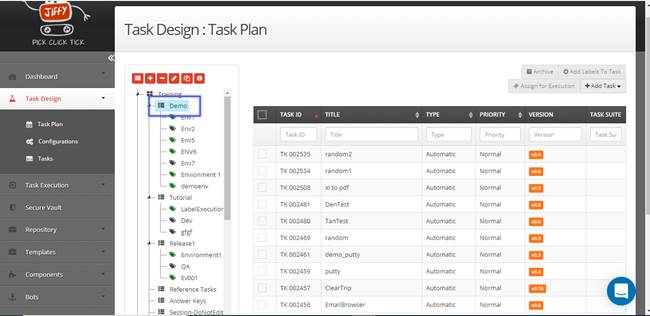
- Click on the Add Task button.
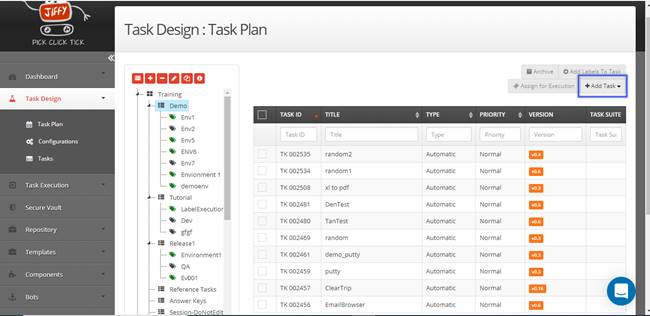
- Select the Import from file option from the dropdown.

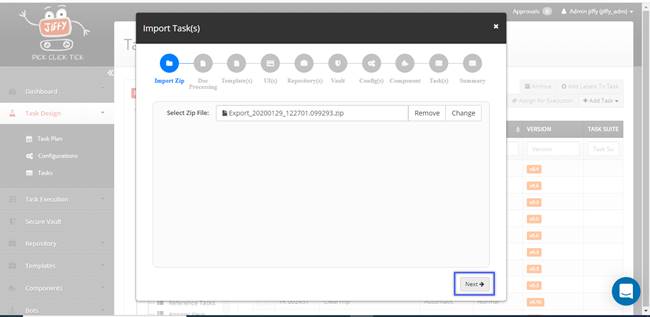
- Click on the Select File button and select the exported zip file which was downloaded earlier.
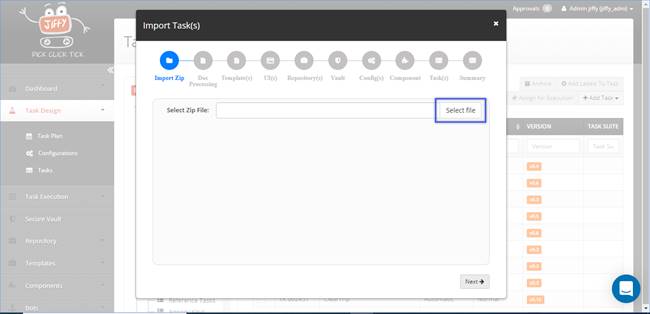
- Click on the Next button.
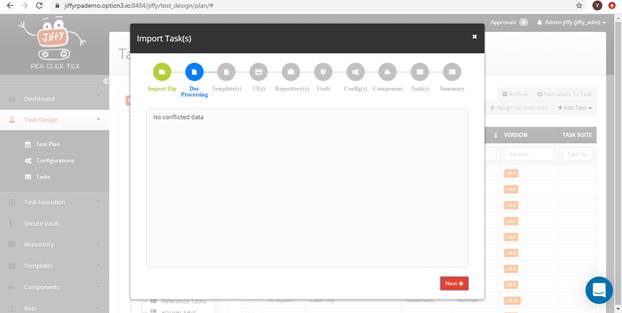
- Select the required documents for Doc Processing needed for that task to import (if it is listed) and click on the Next button.
Note: If there is any PDF processing in the task with Intelligent Document Processing, the following screen will have the details for the same.
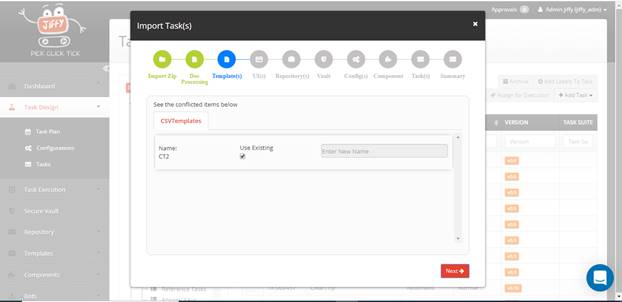
- Select the required Templates needed for that task to import (if it is listed) and click on the Next button.
Note: If the task is using any XML template / CSV template etc, the same will be displayed in the below screen.
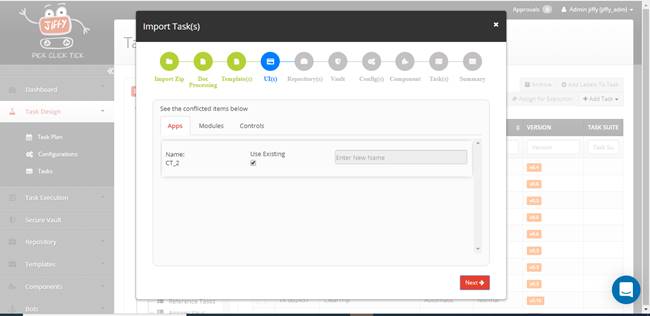
Note: If the task is getting imported for the first time, the Use Existing checkbox will not be available / will not be selected. The same applies to all the below scenario. - Select the Apps (UIs) needed for that task to import (if it is listed) and click on the Next button.
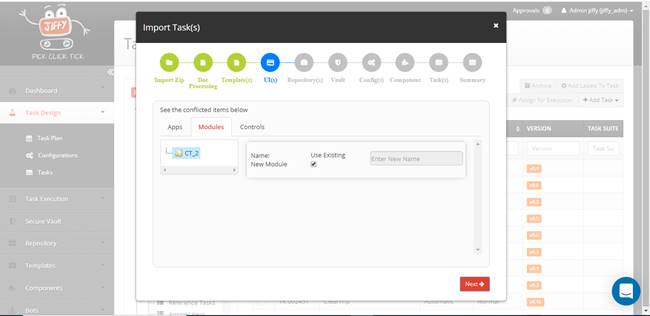
- Select the required modules needed for that task to import (if it is listed) and click on the Next button.
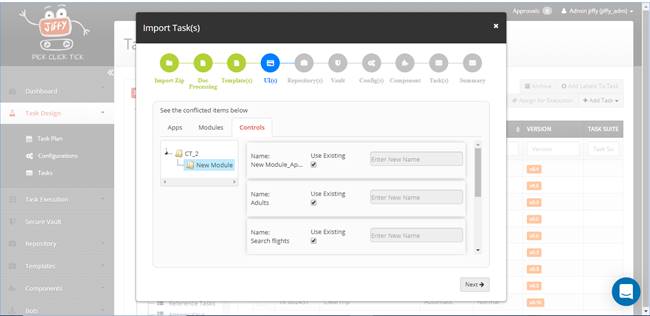
- Select the UI controls needed for that task to import (if it is listed) and click on the Next button.
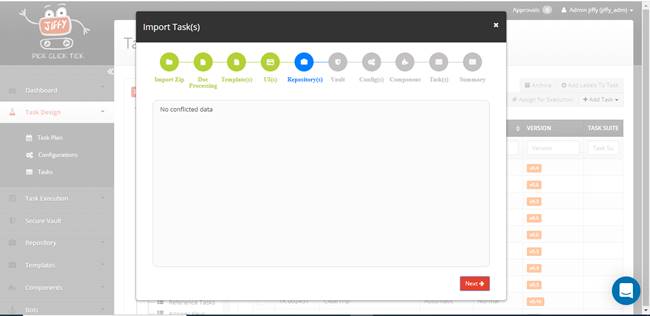
- Select the Repository(s) needed for that task to import (if it is listed) and click on the Next button.
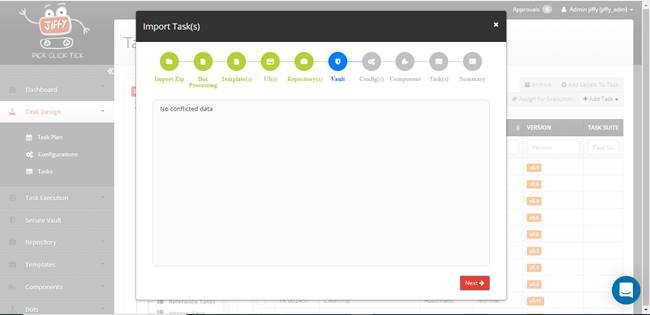
- Select the Vault details needed for that task to import (if it is listed) and click on the Next button.
- Select the Clusters needed for that task to import (if it is listed) and click on the Next button.
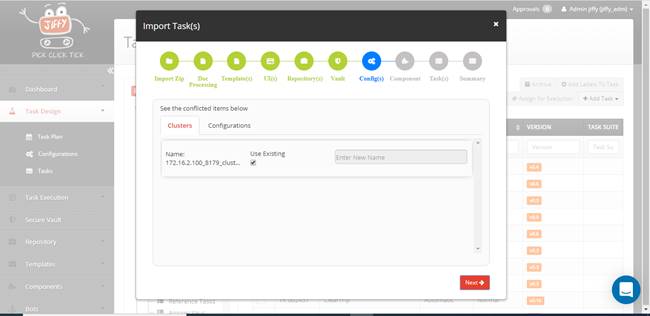
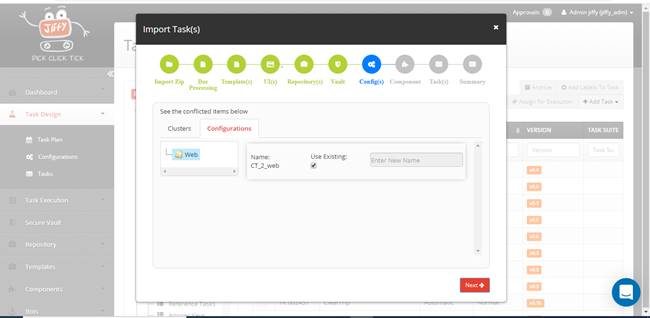
- Select the required Configurations needed for that task to import (if it is listed) and click on the Next button.
- Select the required Component(s) needed for that task to import (if it is listed) and click on the Next button.

- Select the required Task(s) needed for that task to import (if it is listed) and click on the Save and go to Summary button.
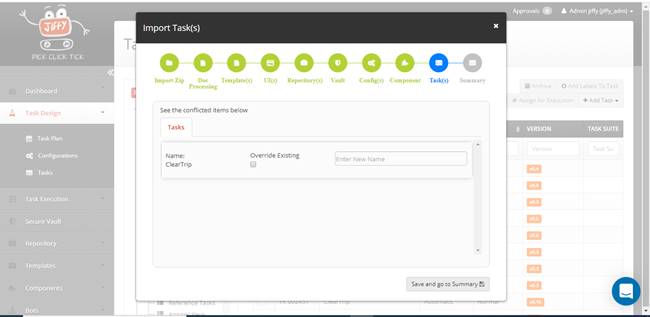
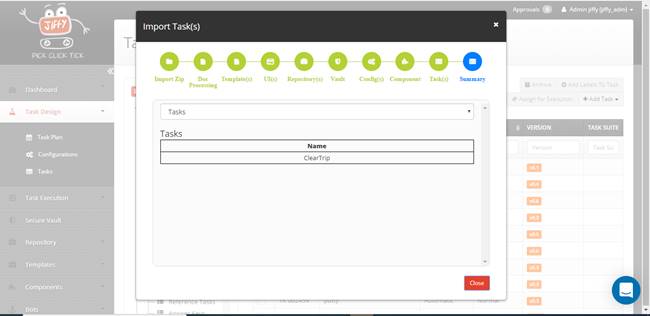
- A summary of the imported task will be displayed.
- Click on the Close button to complete the import of the task to respected release.
Note: Repeat the same steps for all the tasks that need to be imported. In case the App/module already exists, check the Use Existing checkbox.
1.2 Existing Process Upgrade
The steps below should be followed when an existing process is moved from the Development server to the Stage / PROD server due to a change request.- Navigate to Task Design -> Tasks.
- Under the respective release, click on the Task ID of the task which needs to be exported.

- In the Overview tab of the Design page, click on the Export button.

- The export zip file will be downloaded.

- Go to the Jiffy environment where the task needs to be imported to (eg: Staging / PROD environment)
- Navigate to Task Design -> Tasks.
- Select the release where the task must be imported.
- Import the task in the Stage / PROD environment and for each component. Follow the steps mentioned here.

Note: Use the Use Existing or Create new options based on the below table.

- JDI Project, App installation and App upgrade
There are three types of deployments based on the scenarios it is handled.
- Initial setup in a new JDI environment.
- New application creation.
- Upgrade of an existing application.
2.1 JDI Project Installation
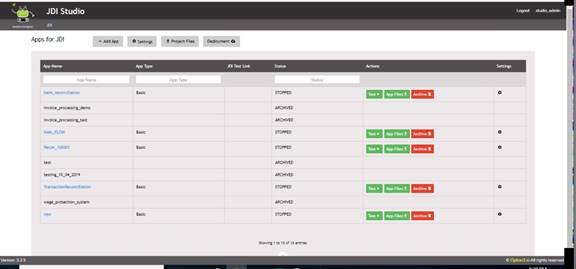
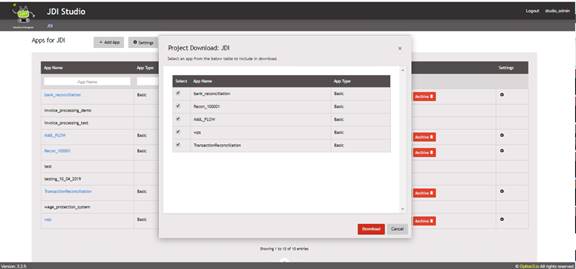
The following steps are used when there are no projects installed. This includes the creation of a project and app.- Download the project file from JDI Studio in the development environment.
- Follow the below commands in the Stage / PROD UNIX server where JDI is installed.
mkdir -p {Mount Point}/JDI/studioJDI/uploadscopy Download Zip from Studio copy to ({Mount Point}/JDI/studioJDI/uploads)
cd {Mount Point}/JDI/studioJDI/uploads
unzip <File name JDI zip>
supervisorctl stop JDI
cd {Mount point}/jiffy/JDI/studioJDI
mv deploy/ deploy_init
cp -rf uploads/{JDI_08_12_2019_15_36_45_125128}/deploy/ /SWA/jiffy/JDI/studioJDI/
cd /SWA/jiffy/JDI/studioJDI/deploy
source \$JIFFY_HOME/.envs/jiffyEnv/bin/activate
python install.py
- Follow on screen instruction
User input: 1
- Type the app name.
- Use the following commands to start the JDI.
supervisorctl start JDIclear the {Mount Point}/JDI/studioJDI/uploads
2.2 New JDI Project Installation
These steps are followed when a new app needs to be created under an existing project.
Note: JDI DB Backup needs to be performed prior to the deployment
- Download App Zip File from studio

- Follow the below commands to initialize the installation.
copy Download Zip from Studio copy to ({Mount Point}/JDI/studioJDI/uploads)cd {Mount Point}/JDI/studioJDI/uploads
unzip <File name JDI zip>
supervisorctl stop JDI
- Follow the below commands to create a backup.
cd {Mount point}/jiffy/JDI/studioJDI/deploysource \$JIFFY_HOME/.envs/jiffyEnv/bin/activate
cd /SWA/jiffy/JDI/studioJDI
python backup.py
cp -rf uploads/JDI_SWA_BASIC_08_13_2019_13_30_13_013287/SWA_BASIC/deploy/src/
- Follow the below commands to finish the installation.
cd deploy
python install.py
- Follow the on-screen instructions.
User input: 2
- Enter the app name.
- Use the below commands to start JDI
supervisorctl start JDI

clear the {Mount Point}/JDI/studioJDI/uploads
2.3 JDI App Upgrade
The JDI App Upgrade option is used in a scenario where there is a CR or changes required in the existing app.
Note: JDI DB Backup need to be performed prior to the deployment
- Download App Zip file from studio

- Follow the below commands initialize the installation.
copy Download Zip from Studio copy to ({Mount Point}/JDI/studioJDI/uploads)

cd {Mount Point}/JDI/studioJDI/uploads

unzip <File name JDI zip>

supervisorctl stop JDI
- Follow the below commands to create a backup.
cd {Mount point}/jiffy/JDI/studioJDI/deploy
source \$JIFFY_HOME/.envs/jiffyEnv/bin/activate
python backup.py
cd /SWA/jiffy/JDI/studioJDI
cp -rf uploads/JDI_SWA_BASIC_08_13_2019_13_48_50_217970/SWA_BASIC/ deploy/src/
- Follow the below commands to install JDI.
cd deploy

python install.py
- Follow the on-screen instructions.
user input: 3
- Type the app name.
- Use the below commands to start JDI
supervisorctl start JDI

clear the {Mount Point}/JDI/studioJDI/uploads
2.4 Troubleshooting
To check the JDI Application DB connection
- Follow the below command sequence.
cd {Mount point}/jiffy/JDI/studioJDI/deploy

source \$JIFFY_HOME/.envs/jiffyEnv/bin/activate

python manage.py dbshell
- To exit, type
exit()