5. Setting up the Bot
The Jiffy service definition and configuration setup is as follows
- Machines :Users will add all the machines which can be used for automation under the module Bots > Machines.
- Clusters :Group machines called Clusters under the module Bots > Clusters. This allows users to group multiple machines under one Cluster
- Configuration :Select the relevant Cluster name at release level execution configuration
Machine
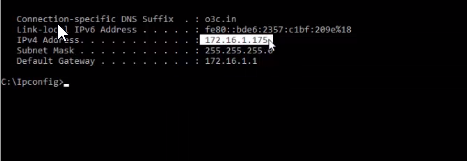
The user must add all the machines where Jiffy client is running, which can be used for automation. In Jiffy, machine is the combination of IP and Port number of the client machines.
Note: For RAAS mode, the machine is created during Jiffy Client installation automatically. For IP mode, the user must add the machine specifying the Host, Port Number, and Capabilities.
Do the following to add a machine:- Login to Jiffy.
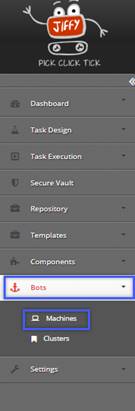
- Click on the Bots drop-down on the left-hand side of the home screen.
- Click on the Machines option.
- Click on the Add Machines button to display the Add Machines window..
.png)
- Type the details in the following fields:
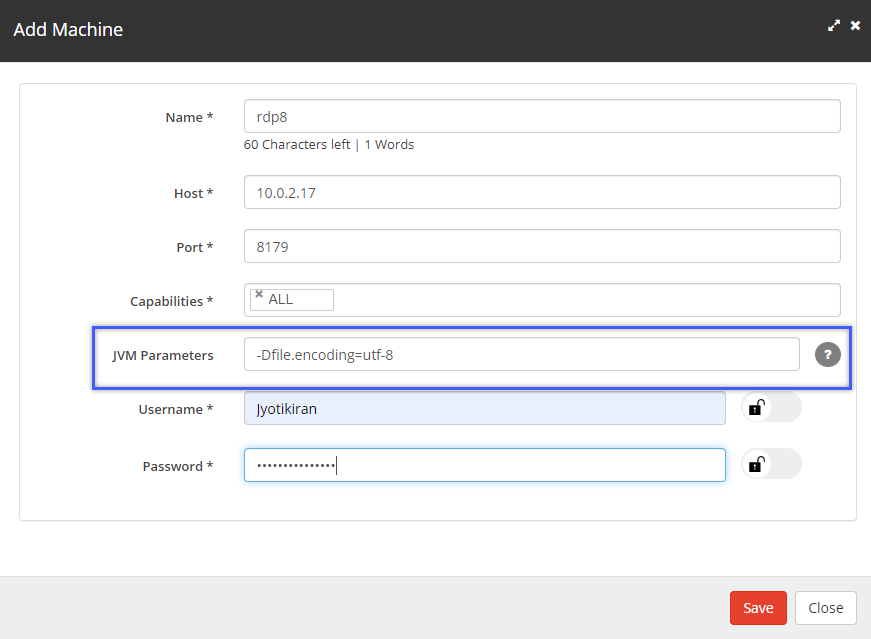
- Name: Type the desired name of the machine.
- Host: Provide Host as machine IP on which the user wants to automate.
- Port: Select the required port (ports between 8179 to 8189).
- Capabilities: The user can select the automation capabilities from this list box. The user can select one or more options, or ALL option based on the required automation capability of that Jiffy service. Jiffy supports the following automation capabilities:
- i. SAP
- ii. Web
- iii. Putty
- iv. Desktop
- v. Excel
- vi. Java
- vii. Mainframe
- viii. PDF
- ix. ALL: Includes all the automation capabilities
- Java Virtual Machine (JVM) Parameters: This text box allows the user to override the default values of the parameters.
- Click the Info icon
 for more details on JVM parameters and how to set up a bot.
- The following are the valid JVM parameters for starting a bot.
- -Xmx<size>m: The user can specify the memory to a bot using this parameter. Example: -Xmx1400m
- Djiffy.mode: The default mode is “run”. If the user wants to debug, then the mode can be changed to “debug”. Example: -Djiffy.mode=debug
- Djiffy.ocr.threshold: OCR character threshold. Example: jiffy.ocr.threshold = 250
- Djiffy.ocr.conversionTimeout: The default time is 3 min. If conversion timeout must be increased, then change the value in milliseconds.
Example: jiffy.ocr.conversionTimeout = 300000
- Click the Info icon
- Username: This field is not mandatory. The Username field is used for Login and Logoff nodes execution. The user can edit this field and provide specific username, if the machine is being used in login and logoff nodes.
- Password: This field is not mandatory. The Password field is used for Login and Logoff nodes execution. The user can edit this field and provide specific password, if the machine is being used in login and logoff nodes.
- Click on the Save button.
Cluster
Grouping of machines called Cluster need to be created under the module Bots>Cluster. This allows users to group multiple services(machines) under one Cluster. The following details will be added for each new Badge added:- Cluster name
- Description
- Machine
This video demonstrates how machines and clusters are added in the jiffy server.
Navigation from Cluster to Machine and from Machine to Cluster:
Navigate to Bots > Clusters screen.
Select the required cluster to view the Cluster Data screen.
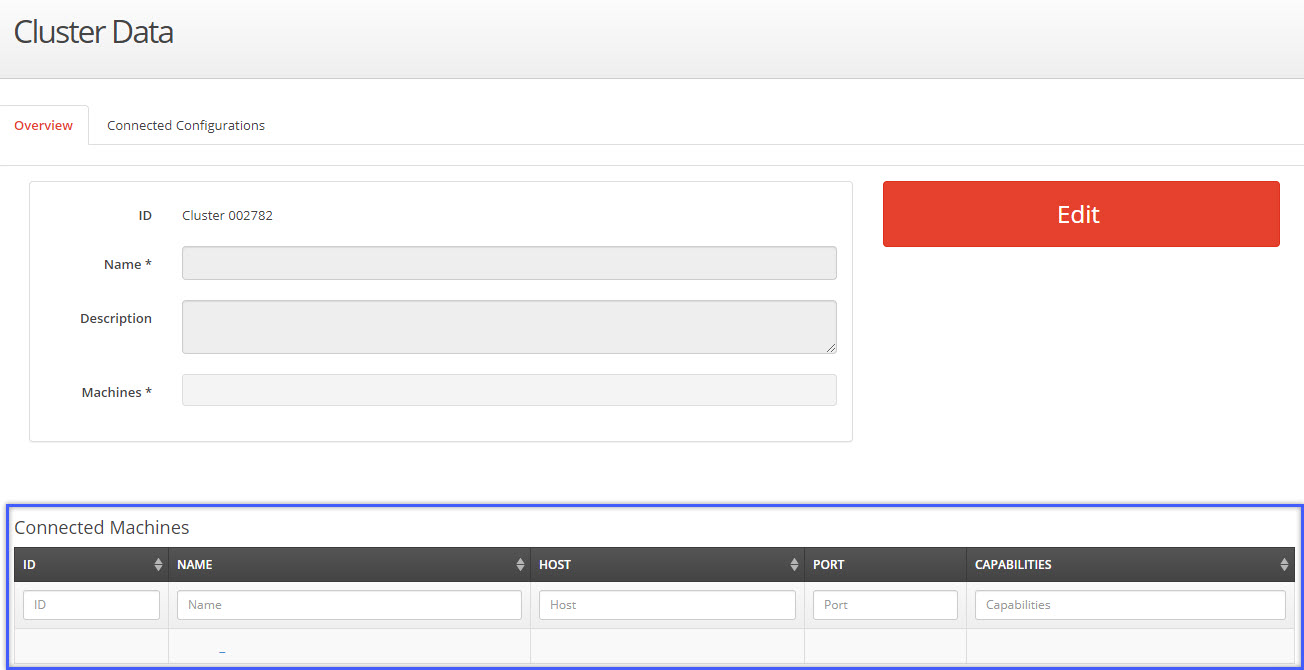
Note: The user can view the machines connected to the selected cluster in the Connected Machines section.
- Click on the machine name to navigate to the Machine Data
screen.
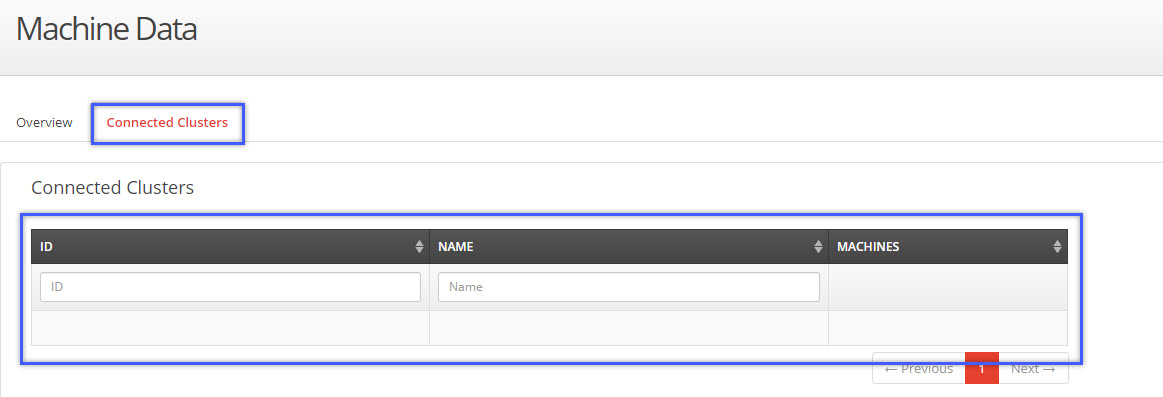
Note: The user can view the clusters connected to the machine in
the Machine Data screen > Connected Clusters tab.
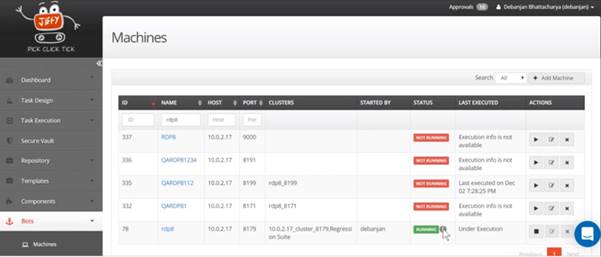
Bot Management:
In the Bots -> Machines page,:
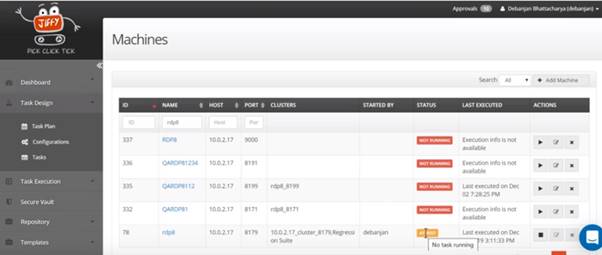
- Two buttons exist to start and stop the bot.
- Click the Start button
 to start the bot.
- Click the Stop button
 to stop the bot.

The user can stop the bot immediately or gracefully:
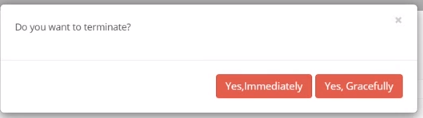
- Click on the Yes, Immediately button to stop the task immediately.
Note: The user can also stop the bot from the Task design screen by clicking on the Stop button. This is an existing feature. - Click on the Yes, Gracefully button to stop the task after the current node execution.
- Click the Start button
- A new column with label name STATUS is added which indicates the status of the bot.
- At Rest: Windows service is running, and the bot is not executing any task.
- Starting: When the bot is starting.
- Running: When the bot is executing some task.
- Stopping: When the bot is stopping.
- Not Running: Windows service is running, and the bot has not started.
- Not Available: If windows service and the bot have not started.
- The updated status of the bot can be viewed by refreshing the page.
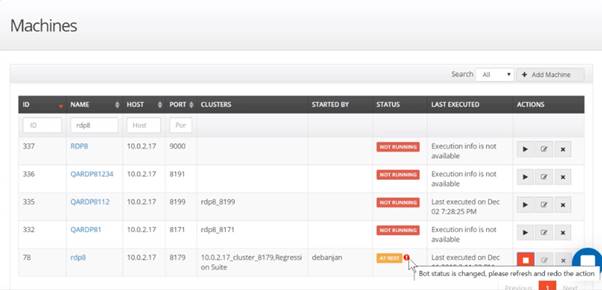
The following screen is displayed after refreshing the page:
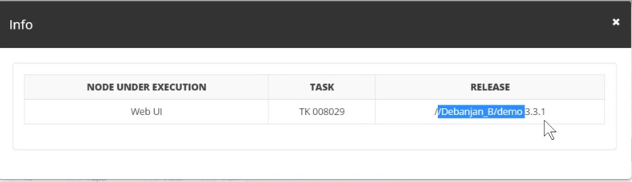
- Click on the
 icon next to the status to display the Info dialog box that contains the following details:
- NODE UNDER EXECUTION: The name of the node that is currently in execution.
- TASK: The ID of the task that is being executed.
- RELEASE: Release details.
- Jasmine (The Jiffy Administrative Module (JAM) interacts with Jasmine to start/stop the bot) on the client-side is decommissioned.
- Two new columns with label name STARTED BY and LAST EXECUTED are added to display the time at which the bot has started and the time at which the bot has stopped.
- The search field is added in the Machines screen to filter the IP/RAAS/All machines