DB
A DB node is used when the input data is stored in the database. Jiffy DB(Database) node allows to connect to any configured Oracle, PSSQL Database, MSSQL by creating the necessary configurations. Data from Jiffy’s JDI or any external databases can be read using the DB Node.
- Pre-condition:
Before using a DB node in designing any task, the Database configuration must be defined.
1.1 Defining Database Configuration:
Do the following to define the Database configuration:- Log in to Jiffy application.
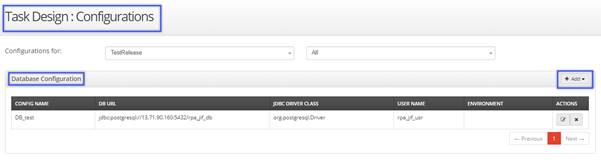
- Navigate to Task Design -> Configurations -> Database Configuration.
- Click on the Add button to define the configuration.
The following list box is displayed with two options:
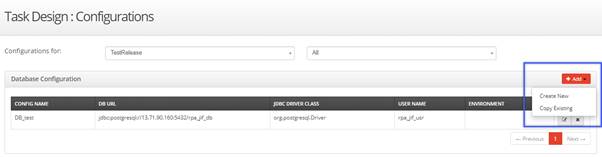
- Create New: Use this option to create a new database configuration.
Do the following to add new configuration:- Click on the Create New button to display the display the Add DataBase Configuration window.
Specify the details for the following fields:
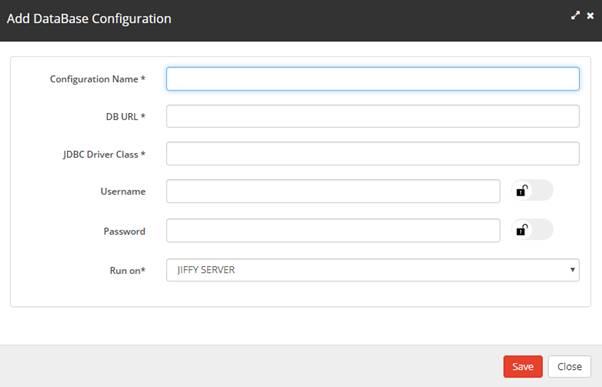
Note: Refer to DataBase Configurations for more details on how to specify the properties. - The Run on:* field has two options.

- Jiffy Server: Selected when a direct interaction is possible between the Jiffy Server and the Database server.
- Cluster: Selected when a direct interaction is not possible between the Jiffy server and the Database server. So, the connection made using the clusters.
- Click on the Save button.
- Click on the Create New button to display the display the Add DataBase Configuration window.
Specify the details for the following fields:
- Copy Existing: Use this option to copy from the existing configurations that are defined earlier.
- Click on the Copy Existing button to display the Copy Configuration window.
- Type the details of the required configuration in the above Search fields.
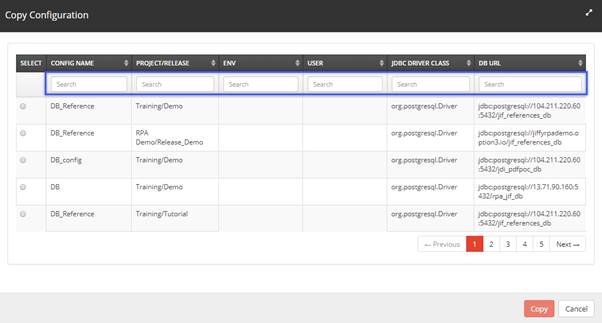
- Select the required configuration from the filtered list.
- Click on the Copy button.
- Create New: Use this option to create a new database configuration.
- Designing a Task Using a DB Node:
- Use an existing task or create a new task based on the requirement.
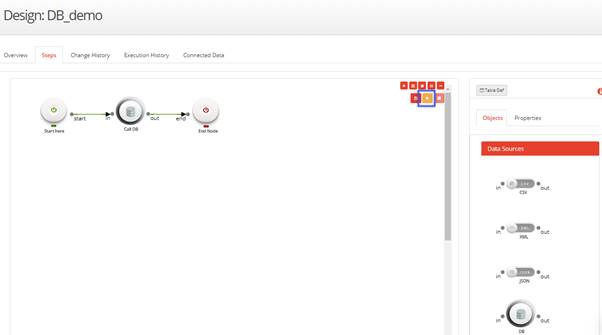
Note: Refer Create A Task for more details on how to create a task and how to open an existing task. - Drag and drop the DB node from the Objects -> Data Sources section and connect the nodes.
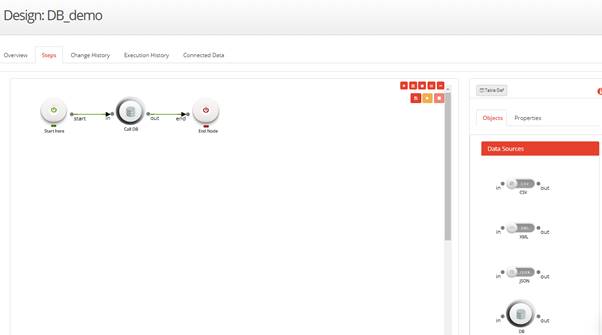
- Click on the DB node and specify the properties:
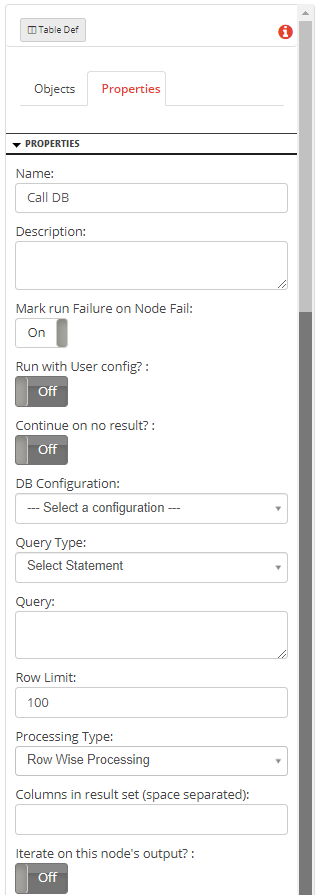
Add the following details:- Name: Name of the node. A default name is displayed in this field, which the user can edit according to the task and the intent of using the node.
- Description: A short note on the purpose of the node.
- Mark run Failure on Node Fail: When the Mark run Failure on Node Fail field is ON, if the node execution fails then the complete task execution is marked as fail.
- Run with User config?: This functionality is now deprecated.
- Continue on no result?: When Continue on no result? field is ON, the task execution continues even when the database query returns no results. When Continue on no result? field is OFF,if the node fails, the execution will not continue to the next node.
- DB Configuration: Selects the database configuration to be used for accessing the database. Refer Defining DB Configuration for more details.
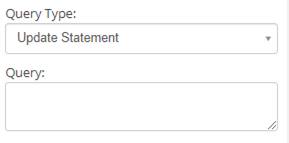
- Query Type: Two types of database queries are supported.
- Select Statement: This is used to select and display the data from the database.
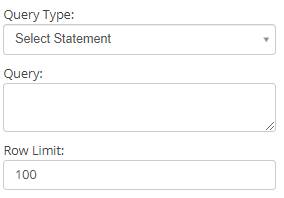
- Row Limit: Number of rows to be selected in the result when the Select query is run. A default value of 100 is set, which the user can modify according to the requirement.
- Update Statement:This is used to Update the existing data or to Insert new data into the database.
- Select Statement: This is used to select and display the data from the database.
- Query: The database query used to get the required results from the database. Note: A proper SQL query needs to be written based on the type of database being used for the node to perform the task correctly.
- Row limit: Number of rows to be fetched in the result. This is set to 100 by default. It can be changed to suit the requirement of the task by increasing the value of Db row limit field in the Server Settings page. Click here. to know more about where the value can be changed.
- Processing Type: Two ways of processing the data present in the database.
- Row Wise Processing: The table contents are traversed row wise to get the result.
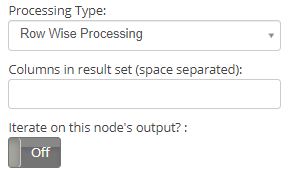
- Columns in result set (space separated): Names of the columns that are needed from the result set. Separate each column name with a space in between them. This is supported only for Select statements.
- Iterate on this node’s output?: When this is turned ON, the task will iterate on the DB node’s output.
- String values: '${String}'
- Integer values: ${Integer}
- Bulk Processing: The entire data is processed as a bulk and the output is stored in a pre - defined table. Refer DataTable node for more details.
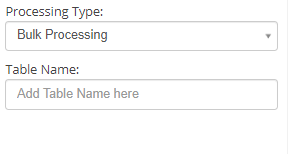
- Table Name: Name of the table being used to store the result data.
- String values: '${input_table.String}'
- Integer values: ${input_table.Integer}
- Row Wise Processing: The table contents are traversed row wise to get the result.
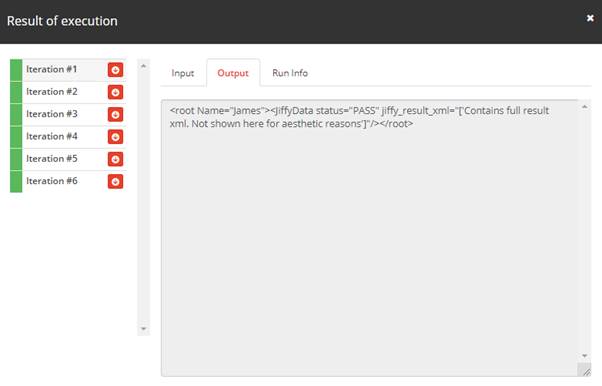
- Click on the Trail Runbutton.
- Click on the book icon above the DB node to display the Result of execution window of the DB node.
- Use an existing task or create a new task based on the requirement.