Web UI
Web UI node is used to automate web applications. It runs the expressions written in Python.
- Pre-condition:
Before designing a task, it is necessary to familiarize the web page using UI Learn. Click here for more information.
1.1 Defining Web Application Execution Configuration:
Note: When the user saves a new App in UI learn, then a configuration is created automatically in Jiffy. The newly created configuration is of the format Appname_Web. If the application name is already existing, then it will be of the format Appname_1_Web.
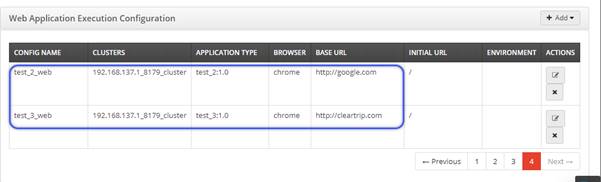
The user can view the configuration created for the application in the Task Design: Configurations -> Web Application Execution Configuration section as shown below.
If the task is for a different release or using/re-using the controls, then the user must create new configuration or can use existing configuration by following the below steps:- Login to Jiffy.
- Navigate to Task Design -> Configurations -> Web Application Execution Configuration.
- Click on the Add button to define the configuration.
The following drop-down is displayed with two options:
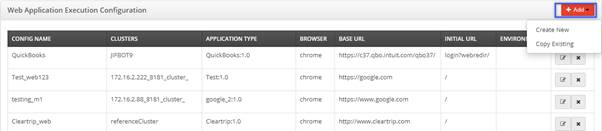
- Create New: Use this option to create a new Web UI configuration.
Do the following to add new configuration:- Click on the Create New button to display the display the Add WebUI Configuration window.
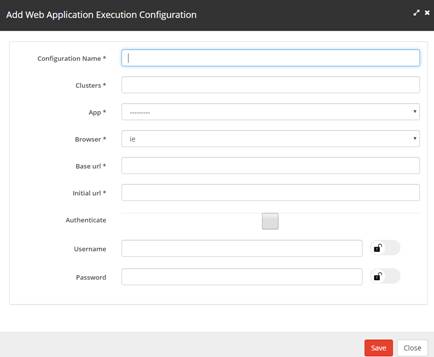
Specify the details for the following fields:- Configuration Name: Name to be provided for the configuration and the specified name is used in the Properties section of the node.
- Clusters: Select the required cluster from this drop-down.
- App: Select the WebUI related application from this drop-down. The WebUI:1 application can be used as a default application.
- Browser: Choose any one of the following options from this drop-down based on the requirement:
- IE
- Chrome
- Firefox
- Base URL: The consistent part of the web address.
Example: https://jiffyrpademo.option3.io:8484
- Initial URL: The URL of the web page that must be launched. This can later be changed accroding to the requirement of the app.
Example: /jiffy/actionables/
- Authenticate: Few web applications require authentication for launching a web page. In that case provide username and password.
- Username, Password: User can provide username and password in the Username and Password field as 3 different types:
- Normal username and password: Type the username and password and click on the Save button.

- Username and password in “Secured Format” using secure vault data: Click and drag the Unlock option to the right side to view a Search icon.
Note: When the Search icon is clicked, the secure keys available for use are displayed in the Search dialog box. For more details on how to add secure keys, click here.

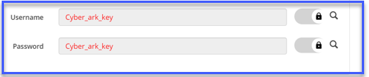
- Username and password in “Secured format” using “CyberArk data”: Click and drag the Unlock option to the right side to view a Search icon.
Note: When the Search icon is clicked, the CyberArk keys available for use are displayed in the Search dialog box. For more details on how to add secure keys that are CyberArk enabled, click here.
- Normal username and password: Type the username and password and click on the Save button.
- Click on the Save button.
- Click on the Create New button to display the display the Add WebUI Configuration window.
- Copy Existing: Use this option to copy from the existing configurations that are defined earlier.
- Click on the Copy Existing button to display the Copy Configuration window.
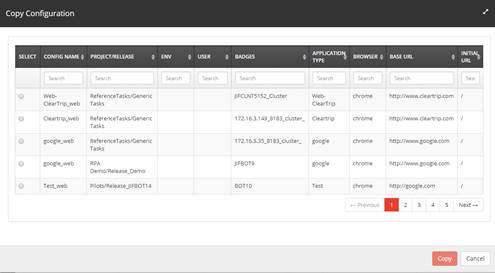
- Type the details of the required configuration in the above Search fields.
- Select the required configuration from the filtered list.
- Click on the Copy button.
- Click on the Copy Existing button to display the Copy Configuration window.
- Create New: Use this option to create a new Web UI configuration.
- Designing a Task Using an Web UI Node:
Do the following to use an Web UI node in a task:
- Use an existing task or create a new task based on the requirement.
Note: Refer Create A Task for more details on how to create a task and how to open an existing task. - Drag and drop the Web UI node from the Objects -> UI section and connect the nodes.

- Click on the Web UI node and specify the properties:
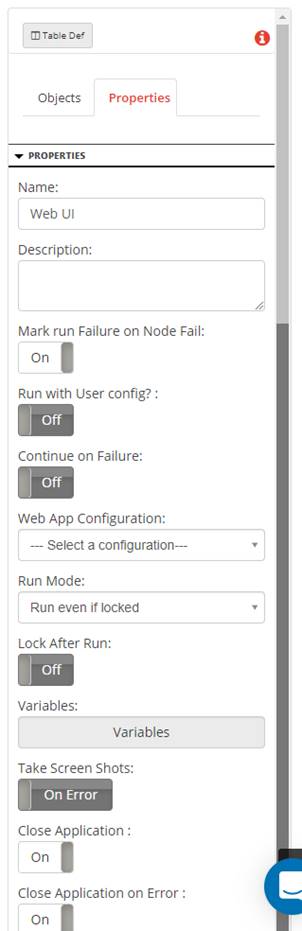
Add the following details:- Name: Name of the node. A default name is displayed in this field, which the user can edit according to the task and the intent of using the node.
- Description: A short note on the purpose of the node.
- Mark run Failure on Node Fail: When the Mark run Failure on Node Fail field is ON, if the node execution fails then the complete task execution is marked as fail.
- Run with User Config?: This functionality is now currently deprecated.
- Continue on Failure: When the Continue on Failure field is ON, even if the node fails, the execution will continue to the next node. When the Continue on Failure field is OFF, if the node fails, the execution will not continue to the next node.
- Web App Configuration: Select the required configuration from the Web UI Configuration drop-down. For more details click here.
- Run Mode: The user can select any one of the following options from the Run Mode drop-down:
- Run if locked: The task runs even if the machine is locked.
- Unlock and run: Unlocks the machine and runs the task.
- Lock After Run: Locks the machine after the node execution.
- Variables: Click on the Variables button to select the input variables and to create an output variable to assign the output of the UI event values.
- To create an output variable, go to Output Variables tab.
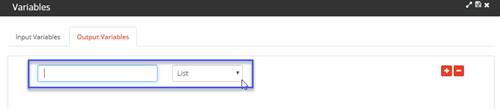
- Type the required name of the output variable in the first text box and then select the type of the output variable from the drop-down. The output variable type can be either List or Table.
Note:If the Table option is selected, define the table structure by clicking on the Table Def button on the right-hand side of the screen. For more details, click here.
To get the table data and store it in a Variable, the user must create a variable as Table with multiple column options (As of now in the task that is provided as an example, there is only one column, so select the SingleColTable).

- Click on the Save button.
- To create an output variable, go to Output Variables tab.
- Take Screen Shots: The user can select either Always or On Error option.
If the user selects Always, then the user can see the screenshot of every UI event step output in the form of images (web application) after a run.
If the user selects On Error, the user can see the screenshot of the step which is failed. In case of any popup messages or any crash on the application, the user can identify it from the screenshot. These images can be passed to next node for further process, for example, to send an email by attaching the screenshot of failure. - Close Application: After completion of WEBUI run, then it will close the web application that is launched during the execution of the task when the Close Application toggle button is in ON position. When the user wants to retain a web application to perform actions on it, then select the Close Application toggle button must be in OFF position.
- Close Application On Error: If it is ON, then the application or website which is launched during execution will close in case of any error in the flow of execution.
- Double click on the Web UI node to display the Edit UI dialogue box.
- The Edit UI dialogue is now displayed with default UI Event option in the first drop-down. This drop-down allows the user to select any of the following options:
- UI Event: All the familiarized UI controls are displayed in this drop-down.
- Set Screen: Select the required module from this drop-down. All the controls of a webpage are grouped together as a module during familiarization, for example, all the login web page controls are grouped in login module.
- Set Variable: There is an option to set a variable inside the UI node. The value to be set can either be a new variable or an existing variable (output variable created in the Properties tab).
- Custom Expression: Jiffy provides a feature to allow users to create custom Python expressions and use them in the UI nodes steps. The Custom Expressions need to be uploaded to Jiffy Repository (Repository -> Custom Expressions). Once it is uploaded, it is available in the drop down of Custom Expressions option.
Note: The expressions must be written in Python script. - Default Expression: These are Jiffy provided python expressions for the commonly used functions. For example: Concat, Capitalize, Add days etc. Click here, for information on Web UI related expressions.
- UI Component: Click here for details on UI components.
- Select the Set Screen option in the Edit UI window.
- Based on the configuration selected in the Properties of Web UI node, all the modules that are familiarized under that application type (application is added while configuration is defined) appears in the drop-down. For more details on the Web UI controls and familiarization, click here.
- Select the required module.
Note: The user must create the steps according to the manual flow of work so that the automation will run as expected.
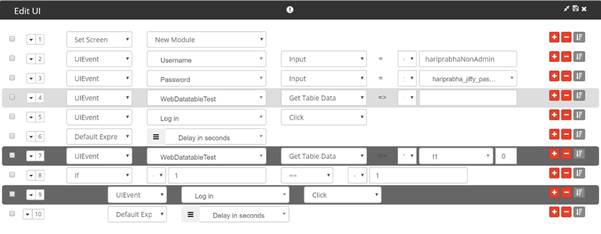
- Select the UI Event option and then select the required UI control for the specific module. The drop-down corresponding to UI control contains the following options:
- Click: When the required UI action to be performed is a “click on the UI control” then select this option.
- DoubleClick: When the required UI action to be performed is a “double-click on the UI control” then select this option.
- Exists: Used to check whether the UI event exists or not.
- ExistsWithImplicitDelay: Use to check for the UI event every 3 seconds, if does not exists, it then waits for 50 seconds and further steps are processed.
- GetText: Used to get the text value of any UI event.
- Input: Used for providing inputs to an UI event, for example: Username
- Keyboard: Use this option when any key has to be pressed from the keyboard, for example: Enter key.
- Virtual Input: Used to enter data in non-editable fields (For Ex: A field with a date picker) directly during the task design.
- Virtual Click: Used to scroll a web page to view and click an element that is not visible in the current screen layout.
For Example: If a “Submit” button is present at the end of a web page, it can be clicked when it is currently not seen on the screen, using this action.
- Currently Jiffy supports only Get Table Data option for the table type controls.
Note: The Get Table Data option is used to get the table data that is familiarized using Table familiarization method. - Click on the Save button in the Edit UI dialog after designing all the steps.
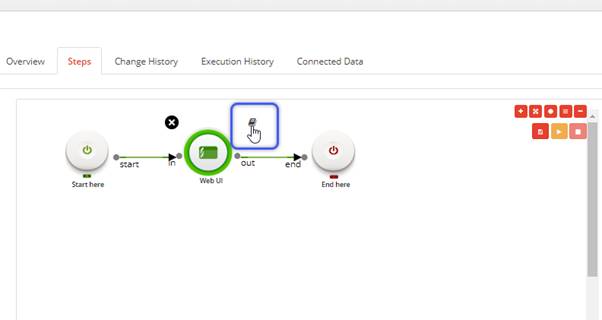
- Click on the Trail Run icon.
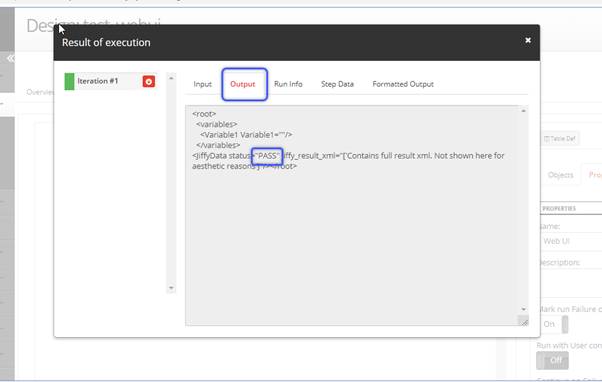
- Select the Web UI node and click on the Book icon to view the Result of execution screen.
Note: If the node turns green, it indicates that the node is executed successfully. If the node turns red, then it indicates that the execution is failed.
- To view the output of table familiarization, click on the Formatted Output tab.
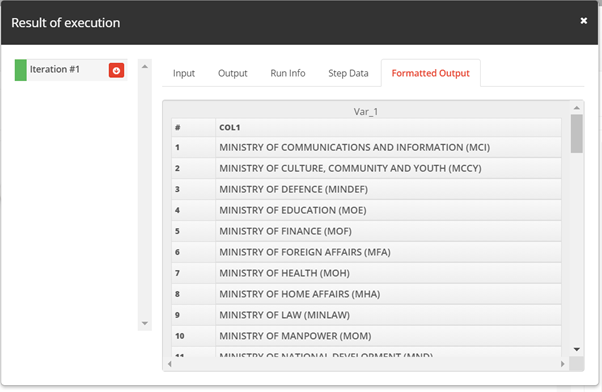

Note:While using UI nodes, only 5 nested IF nodes can be used. - Use an existing task or create a new task based on the requirement.