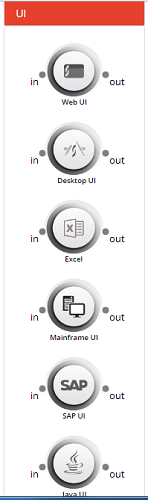
4. UI
Jiffy UI nodes allows user to automate UI screens of any other application. For example, Web pages, Mainframe, SAP, Desktop based applications etc. All UI nodes except Excel node works in similar method. Here automation is a two phase approach, first the UI pages needs to be familiarized using Jiffy UI Learn App and then scripting needs to be done in tasks using corresponding UI nodes. Refer to UI Tasks for more details on this.
But Excel node does not require UI familiarization, any excel sheet can be accessed and automated directly using Excel nodes.
UI nodes can be configured to run in 2 modes options.
All the UI nodes have an option Run mode as below:
Unlock and Run: If the Machine is locked and correct Username and Password is provided in the Machine details, the machine will be unlocked before the node execution.
Run Even if locked: If the machine is locked , during the execution it will NOT Unlock but execution happen in the background.
In addition to that, there is an option to set what action to be done after the task execution like Lock After Run on or off. This ensures the security in case of unattended BOT scenarios.
Web UI
Web UI nodes are used to automate web pages. Refer to UI Tasks for more details on this.
Desktop UI
To automate the user interface of any desktop application. Refer to UI Tasks for more details on this. Below video demonstrates designing of task with Desktop UI node.
Mainframe UI
To automate the screens of Mainframe application. Refer to UI Tasks for more details on this.
SAP UI
To automate screens of SAP application. Refer to UI Tasks for more details on this.
Excel
Excel node is used to access an excel sheet and perform different actions in excel sheets using Jiffy. Any excel sheet can be accessed and automated directly using Excel node. Excel node does not require familiarization.
- Pre-condition:
Before using a Excel node in designing any task, the Excel configuration must be defined.
- Defining Excel Configuration:
Do the following to define the Excel configuration:- Login to Jiffy.
- Navigate to Task Design -> Configurations -> Excel Configuration.
- Click on the Add button to define the configuration.

The following dropdown is displayed with two options:

- Create New: Use this option to create a new Excel configuration.
Do the following to add new configuration:- Click on the Create New button to display the display the Add Excel Configuration window.

Specify the details for the following fields:- Configuration Name: Name to be provided for the configuration and the specified name is used in the Properties section of the node.
- Clusters: Select the required cluster from this drop-down.
- App: Select the excel related application from this drop-down. The excel:1 application can be used as a default application.
- Click on the Create New button to display the display the Add Excel Configuration window.
- Copy Existing: Use this option to copy from the existing configurations that are defined earlier.
- Click on the Copy Existing button to display the Copy Configuration window.

- Type the details of the required configuration in the above Search fields.
- Select the required configuration from the filtered list.
- Click on the Copy button.
- Click on the Copy Existing button to display the Copy Configuration window.
- Create New: Use this option to create a new Excel configuration.
- Designing a Task Using an Excel Node:
Do the following to use an Excel node in a task:
- Use an existing task or create a new task based on the requirement.
Note: Refer Create A Task for more details on how to create a task and how to open an existing task. - Drag and drop the Excel node from the Objects -> Miscellaneous section and connect the nodes.

- Specify the properties of the Excel node:

Add the following details:- Name: Name of the node. A default name is displayed in this field, which the user can edit according to the task and the intent of using the node.
- Description: A short note on the purpose of the node.
- Mark run Failure on Node Fail: When the Mark run Failure on Node Fail field is ON, if the node execution fails then the complete task execution is marked as fail.
- Run with User Config?: This functionality is now currently deprecated.
- Continue on Failure: The execution of the task continues, even if the node execution fails.
- Excel Configuration: Select the required configuration from the Excel Configuration dropdown. For more details click here.
- Run Mode: The user can select any one of the following options from the Run Mode dropdown:
- Run if locked: The task runs even if the machine is locked.
- Unlock and run: Unlocks the machine and runs the task.
- Lock After Run: Locks the machine after the node execution.
- Variables: Click on the Variables button to select the input variables and to create an output variable.
- To create an output variable, go to Output Variables tab.

- Type the required name of the output variable in the first text box and then select the type of the output variable from the dropdown. The output variable type can be either List or Table. Note:If the Table option is selected, define the table structure by clicking on the Table Def button on the right-hand side of the screen. For more details, click here.
- To create an output variable, go to Output Variables tab.
- Double click on the Excel node to display the Edit UI dialogue box.
- The Edit UI dialogue is now displayed with default Excel Cmd option in the first dropdown. This dropdown allows the user to select any of the following options:
- Excel Cmd
- Run Macro
- Custom Excel Cmd
- Set Variable
- Default Expr
- Custom Expr
- Using the Excel Cmd functionality, the user can perform various actions on the Excel sheet.

- Select the excel commands from the dropdown present next to the Excel Cmd field. For more details on the excel commands, click here
- Click on the Save button.
- Click on the Trail Run icon.
- Select the Excel node and click on the Book icon to view the Result of execution screen.


- Use an existing task or create a new task based on the requirement.
- Commands available on Excel Node:
The following are the list of the available commands:
- In the Edit UI dialog, select the Open Excel command.

- Click on the following highlighted icon.

- Select the any of the following options from the following highlighted dropdownes based on the requirement:

- V: The user can select this option when the excel sheet must be opened based on the input variable from the previous nodes. Select the V option and then select the respective variable.
- C: The user can select this option when the excel sheet must be opened based on the given file path. Select the C option and then type the file path in the path text box (separate each folder by double slash (\) in the folder path).
For example, G:\My Drive\Excel_Tracker.xlsx

- S:The user can select this option when the excel sheet must be opened based on the secure vault value. Select the S option and then select the secure vault value.
- The specified excel sheet is now open.
- In the Edit UI dialog, select the Open Protected Excel command, specify the path and type the password.

- In the Edit UI dialog, select the C option, select the Select Sheet By Index command and then type the sheet index (for example, 1 for Sheet1, 2 for Sheet2, etc.)

- In the Edit UI dialog, select the C option, select the Select Sheet By Name command and then type the sheet name.

- In the Edit UI dialog, provide the following details:
- table_name: Type the name of the table specified in the Edit Table Definition dialog box. Click the Table Def button on the right-hand side of the Task Design-> Steps screen to display the Edit Table Definition dialog box.
- range_value: Specify the range of cells that must be copied to the table.
- sheet_name: Name of the excel sheet from which the data must be copied.
- Select the value from the following highlighted dropdown.

- Select the V option (Variable) and then select the pre-defined output variable (Properties -> Variables -> Output).

- In the Edit UI dialog, select the Clear Range command and then type the cell range in the following format.
A2:D2

- In the Edit UI dialog, select the Close Active File command.

- In the Edit UI dialog, select the Close Excel

- In the Edit UI dialog, select the Close File command.
- Select the C option and then select the working sheet that must be closed.

- In the Edit UI dialog, select the Convert Col Letter command and type the column letter.

- In the Edit UI dialog, select the Convert Col No To Letter command and type the column number.

- In the Edit UI dialog, select the Copy MetaData command.
- Specify the cell range.

- Specify the output variable.
- In the Edit UI dialog, select the Copy To Clipboard command.
- Specify the cell range.

- In the Edit UI dialog, provide the following details:

- table_name: Type the name of the table specified in the Edit Table Definition dialog box (Click the Table Def button on the right-hand side of the Task Design-> Steps screen to display the Edit Table Definition dialog box.).
- range_value: Specify the range of cells that must be copied to the table.
- Select the value from the following highlighted dropdown.

- Select the V option (Variable) and then select the pre-defined output variable (Properties -> Variables -> Output).

- In the Edit UI dialog, provide the following details:
- range: Specify the range of cells that must be copied to the table.

- range: Specify the range of cells that must be copied to the table.
- Select the required value from the following highlighted dropdown.

- Select the V option (Variable) and then select the pre-defined output variable (Properties -> Variables -> Output).

- In the Edit UI dialog, select the Create Sheet command and then type the required sheet name:

- In the Edit UI dialog, select the Delete Column command and then type column name in letter format, for example, A:

- In the Edit UI dialog, select the Delete Range command and then type the column range.

- In the Edit UI dialog, select the Delete Row command and then type the specific row number.

- In the Edit UI dialog, select the Delete Sheet By Index command, select the C option and then type the sheet index (for example, 1 for Sheet1, 2 for Sheet2, etc.)

- In the Edit UI dialog, select the Delete Sheet By Name command, select the C option and then type the sheet name.

- In the Edit UI dialog, select the Get Cell Value command, select the C option and then type the cell address (for example, A1).

- table_name: Type the name of the table specified in the Edit Table Definition dialog box (Click the Table Def button on the right-hand side of the Task Design-> Steps screen to display the Edit Table Definition dialog box.).
- range_value: Specify the range of cells that must be copied to the table.
- Select the value from the following highlighted dropdown.

- Select the V option (Variable) and then select the pre-defined output variable (Properties -> Variables -> Output).

- In the Edit UI dialog, select the Get Last Cell with Data command.
- Select the value from the following highlighted dropdown.

- Select the V option (Variable) and then select the pre-defined output variable (Properties -> Variables -> Output).

- In the Edit UI dialog, select the Get Last Column with Data command.
- Select the value from the following highlighted dropdown.

- Select the V option (Variable) and then select the pre-defined output variable (Properties -> Variables -> Output).

- In the Edit UI dialog, select the Get Last Row And Column with Data command.
- Select the value from the following highlighted dropdown.

- Select the V option (Variable) and then select the pre-defined output variable (Properties -> Variables -> Output).

- In the Edit UI dialog, select the Get Last Row with Data command.
- Select the value from the following highlighted dropdown.

- Select the V option (Variable) and then select the pre-defined output variable (Properties -> Variables -> Output).

- In the Edit UI dialog, select the Insert Column command and then type the required column letter.

- In the Edit UI dialog, select the Insert Row command and then type the required row number.

- In the Edit UI dialog, select the Paste From Table command and type the required table name (that is defined the Edit Table Definition dialog box (navigation path: Task Design screen-> Steps -> Table Def -> Edit Table Definition dialog box) and cell value.

- In the Edit UI dialog, select the Paste MetaData command and select the output variable that is given in the Copy Metadata command.

- In the Edit UI dialog, select the Paste MetaData From Clipboard command and type the required cell range.

- In the Edit UI dialog, select the Paste Value command and select the output variable that is given in the Copy Value command.

- In the Edit UI dialog, select the Paste Value From Clipboard command and type the required range.

- In the Edit UI dialog, select the Remove Module command and type the module name.

- In the Edit UI dialog, select the Rename Sheet By Index command, select the C option and then type the sheet index (for example, 1 for Sheet1, 2 for Sheet2, etc.) and new name of the sheet.

- In the Edit UI dialog, select the Rename Sheet By Index command, select the C option and then type the sheet name and new name of the sheet.

- In the Edit UI dialog, select the Run Macro command, select the C option and then type the required macro name.
Note: The typed macro name must be existing in the excel file.

- In the Edit UI dialog, select the Save File command.

- In the Edit UI dialog, select the Save File As command, select the C option and then type the required file path.

- In the Edit UI dialog, select the Send Keys command, select the C option and then type the string type specifying the keystrokes to send.

- In the Edit UI dialog, select the Update Cells command, select the C option and then type the update range and update value.

- In the Edit UI dialog, select the Run Macro commandand select the required excel macro (the list box displays the excel macros that are present in the Repository -> Excel Macros).
Click here for more details on adding an Excel Macro to repository.

- In order to use macros, the excel sheet used must be macro enabled with file extension .xlsm
- Excel must be configured to accept VBA macros execution. Select the below higlighted options in the File-> Option->Trust Center ->Macro Settings screen.

Open Excel:
The Open excel feature is used to Open a specified excel. Note: Make sure that the selected excel sheet is available in the specified machine\cluster. If the selected excel file is not available in the specified folder, then a new excel file is created and opened.
Open Protected Excel:
The Open Protected Excel feature is used to open a password protected excel of the following format: xls, xlsx, xlsm, .csv files.
Select Sheet By Index:
The Select Sheet By Index command is used to select a sheet by the specified index number.

Select Sheet By Name:
The Select Sheet By Name command is used to select a sheet by the specified index number.

Bulk Copy To Table:
The Bulk Copy To Table command is used to bulk copy a range of cell data from a specified sheet to a defined data table without cell metadata.

Clear Range:
The Clear Range command is used to clear the data from a range of cells.
Close Active File:
The Close Active File command is used to clear the data from a range of cells.
Close Excel:
The Close Excel command is used to close the excel application.
Close File:
The Close File command is used to close the excel working sheet that is specified.
Convert Col Letter To Number:
The Convert Col Letter To Number command is used to convert the letter in a column to number format.
For example, If the letter in a column is A, then it is converted to 1.
Convert Col No To Letter:
The Convert Col No To Letter: command is used to convert the number in a column to letter format.
For example, If the letter in a column is 1, then it is converted to A.
Copy MetaData:
The Copy MetaData command is used to copy the metadata (copies value along with its format like, font, colour etc.,) of the specified range of cells.
Copy To Clipboard:
The Copy To Clipboard command is used to copy the contents and the metadata of the given range of cells or a single cell to clipboard.
For example, C3, A3:C3.
Copy To Table:
The Copy To Table command is used to copy a range of cell data to a data table (includes metadata).
Copy To Table Without MetaData:
The Copy To Table Without MetaData command is used to copy a range of cell data to a data table (does not include metadata).
Copy Value:
The Copy Value command is used to copy a specific range of cells
Create Sheet:
The Create Sheet command is used to create a new sheet in an excel file.
Delete Column:
The Delete Column command is used to create a new sheet in an excel file.
Delete Range:
The Delete Range command is used to delete the specific range of cells.
Delete Row:
The Delete Row command is used to delete the specific row.
Delete Sheet By Index:
The Delete Sheet By Index command is used to delete a sheet by the specified index number.
Delete Sheet By Name:
The Delete Sheet By Index command is used to delete a sheet by the specified name.
Get Cell Value:
The Get Cell Value command is used to get specific cell value as text (the data within the specified cell).
For example, the output is 12 if the A1 cell contains the value 12 in it.
Get Last Cell with Data:
The Get Last Cell with Data command is used to get the last cell address with data.
For example, the output is D3, if it is the last cell that contains data.
Get Last Column with Data:
The Get Last Column with Data command is used to get the last column address with data.
For example, the output is 3, if it is the last column that contains data.
Get Last Row And Column with Data:
The Get Last Row And Column with Data command is used to get the last row and column address with data.
For example, if the output is (14,1), it means that the last row with data is 14 and the last column is A.
Get Last Row with Data:
The Get Last Row with Data command is used to get the last row address with data.
For example, the output is 1, if row 1 is the last row with data in it.
Insert Column:
The Insert Column command is used to insert a new column.
Insert Row:
The Insert Row command is used to insert a new row.
Paste From Table:
The Paste From Table command is used to paste data from data table to an excel file.
Paste MetaData:
The Paste MetaData command is used to paste metadata that is copied using Copy Metadata command to the same copied cell range in a selected sheet.
For example, if the data is copied from A1:C1 cell range in sheet 1, the same data is pasted to A1:C1 in sheet 2.
Paste MetaData From Clipboard:
The Paste MetaData From Clipboard command is used to paste metadata that is copied using Copy To Clipboard command to a specific range.
Paste Value:
The Paste Value command is used to paste values that are copied using Copy Value command to the same copied cell range in a selected sheet.
For example, if the data is copied from A1:C1 cell range in sheet 1, the same data is pasted to A1:C1 in sheet 2.
Paste Value From Clipboard:
The Paste Value From Clipboard command is used to paste values from a clip board that is copied using Copy To Clipboard command to a specific range.
Remove Module:
The Remove Module command is used to delete an existing module.
Rename Sheet By Index:
The Rename Sheet By Index command is used to rename a selected sheet by the specified index number.
Rename Sheet By Name:
The Rename Sheet By Name command is used to rename a selected sheet by the specified name.
Run Macro:
A macro is an action or a set of actions that the user can run as many times as required. When a macro is created, the mouse clicks and keystrokes are recorded.
The Run Macro command is used to run a macro in a excel workbook.
Save File:
The Save File command is used to save an excel file.
Save File As:
The Save File As command is used to save an existing file to another folder.
Send Keys:
The Send Keys command is used to send keys to a file.
Update Cells:
The Update Cells command is used to update the cells of a specified range.
Excel Macros:
There is an additional feature in Excel node where the excel macros can be created and saved in repository and can be used while doing the scripting for excel node in task design.
- In the Edit UI dialog, select the Open Excel command.
Adding an Excel Macro to the Repository:
- Log in to Jiffy.
- Click on the Repository drop-down on the left-hand side of the screen.
- Click on the Excel Macros option.
- Click on the Add Excel Macros button.

- Specify the following details:

- Name
- Description
- Module Name
- Function Name
- Click on the Save button.
- Click on the Edit button.

- Copy the code of the macro from the excel sheet (Excel file -> Developer -> Macros -> Edit button) and paste the code into the Excel Macro Script field.
Note: Make sure that the Function Name is same as the code following the “Sub” code line as highlighted below. If it is not same, edit the Function Name.

Other Options in UI Steps:
In addition to the excel commands, the user can use the following actions in the UI steps of the Excel node.
Note: This is applicable for all the UI nodes.- Set Variable: There is an option to set a variable inside the UI node. The value to be set can either be a constant or another variable. If this variable is set as an output variable in the Properties tab, it can be made available for other nodes as well.
- Default Expressions: These are Jiffy provided python expressions for the commonly used functions. For example: Concat, Capitalize, Add days etc.
- Custom Expressions: Jiffy provides a feature to allow users to create custom Python expressions and use them in the UI nodes steps. The Custom Expressions need to be uploaded to Jiffy Repository (Repository -> Custom Expressions:). Once it is uploaded, it is available in the drop down of Custom Expressions option.
- While OR IF: User can use While loop / IF condition inside the UI node. Click on the following highlighted button at right corner of the Edit UI dialog to select While/IF option.