Data Table
DataTable node is a concept provided in Jiffy to fetch table data. Data Table node does not fetch data from any external source. Instead, it receives data through mapping from the previous nodes and stores that data in a Datatable.
It can receive data from Web UI node, DB node, Email Browser node, and Excel node.
- Designing a Task Using a Data Table Node:
Do the following to use an Data Table node in a task:
- Use an existing task or create a new task based on the requirement.
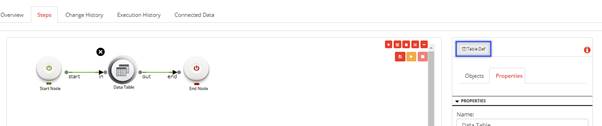
Note: Refer Create A Task for more details on how to create a task and how to open an existing task. - Drag and drop the Data Table node from the Objects -> Data Sources section and connect the nodes.
- Getting an input from the Excel Node
- Mapping the input to a Custom Datatable.
- Sending the data from the Datatable to the Web UI node.
- Click on the Table Def button to create a datatable to store the data in. Refer Types of Datatables for more details.
Note: The names of the columns can be different, but the order of the columns should be the same as the order in which the data is to be extracted from the Excel file.
The following dialogue box opens:
- Click on the Excel node and specify the properties. Use the “Bulk Copy To Table” command.
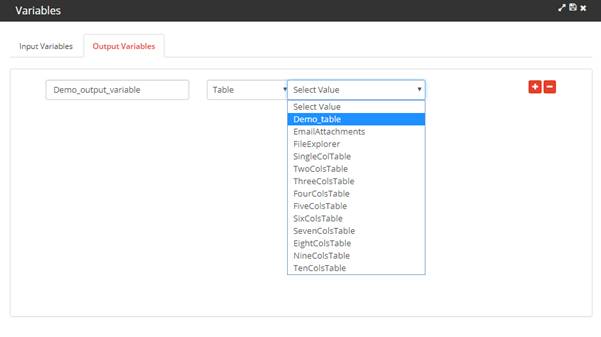
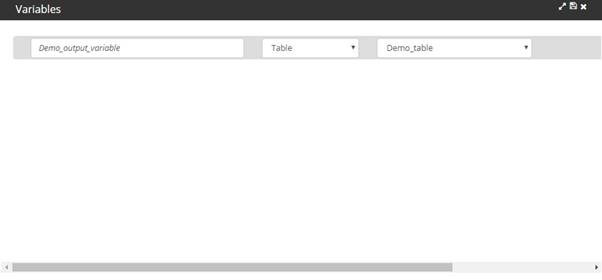
For more information, click Excel -> Commands Available on Excel Node -> Bulk Copy To Table section in this link. - Create an Output Variable in the Excel node of type “Table”. Select the name of the Custom Datatable that is created in the above steps from the highlighted dropdown.

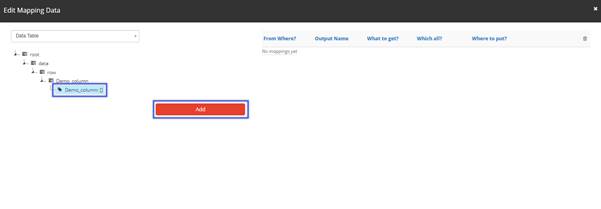
- Double click on the connector to map the input from the Excel node to the Data Table node.
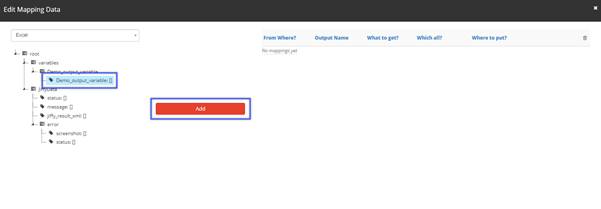
- Select the name of the excel output variable and click on Add to complete the mapping.

- Click on the Data Table node and specify the properties:
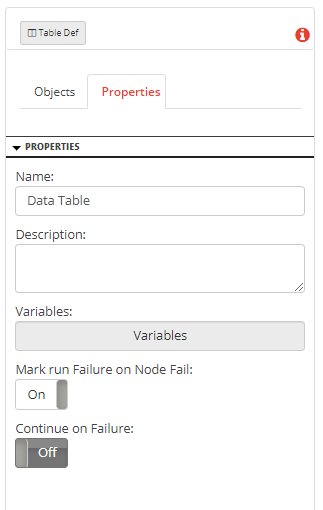
- Name: Name of the node. A default name is displayed in this field, which the user can edit according to the task and the intent of using the node.
- Description: A short note on the purpose of the node.
- Variables: Data Table node accepts only Input variables. This is to accept input from a node which is placed before the Data Table node. The output will always be sent to a selected table.
Note:For this example, Select the Variable in the Data Table node. The name of the excel variable appears. Change the type to “Table”. Select the name of the Custom Datatable in the dropdown.

- Mark run Failure on Node Fail: When the Mark run Failure on Node Fail field is ON, if the node execution fails then the complete task execution is marked as fail.
- Continue on Failure: When Continue on Failure field is ON, the task execution continues even when the data transfer fails.
- Double click on the connector to map the required elements to the Web UI node.
- Select the name of the variable and click on Add to complete the mapping.
- Click on the Web UI node and specify the properties. Refer to Web UI Node for more details.
- Click on the Trail Run button.
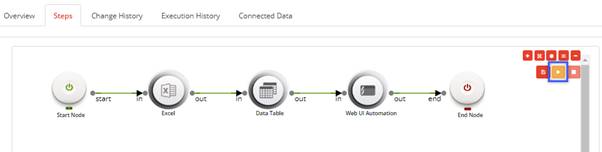
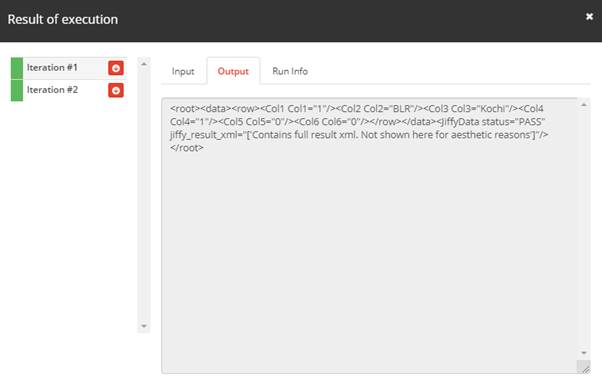
- Click on the book icon above the Data Table node to display the Result of execution window of the Data Table node.
Note: As mentioned earlier, the Data Table node must have inputs from a previous node (Web UI node, DB node, Email Browser node or Excel node).
The Data Table node functionality is explained considering the following example:

- Use an existing task or create a new task based on the requirement.
- Types of Datatables:
There are two types of datatables:
- Default datatable
- Custom datatable
- 2.1 Default Datatable: These are the predefined formats of table that are readily available for the user to use. The column names of these data tables are not editable. The data type of all the columns is set to String by default and cannot be changed by the user.
- 2.1.1. List of Default Datatables available:
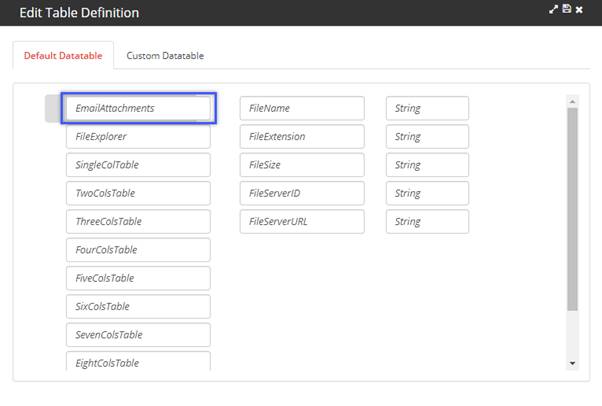
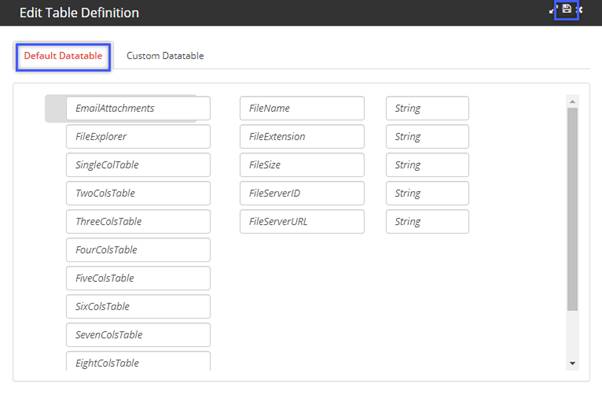
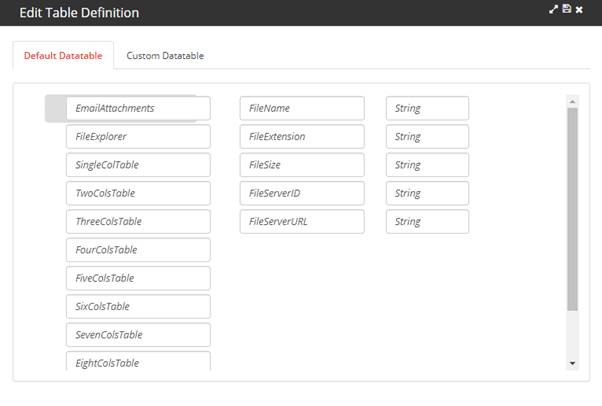
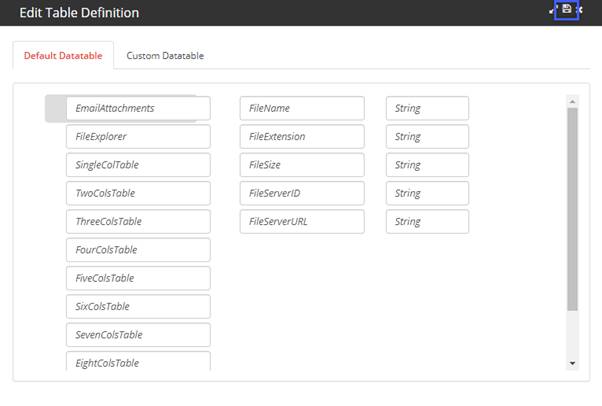
- EmailAttachments:
- FileName
- FileExtension
- FileSize
- FileServerID
- FileServerURL
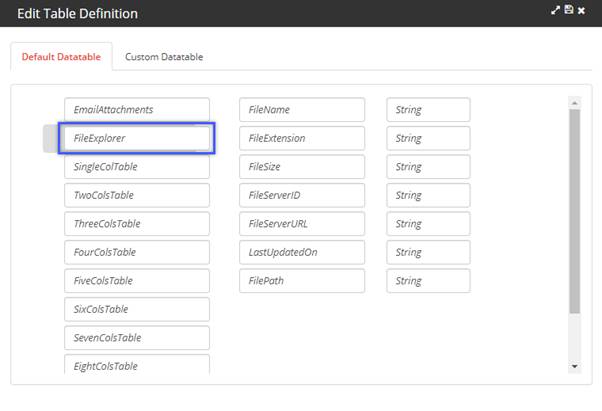
- FileExplorer:
- FileName
- FileExtension
- FileSize
- FileServerID
- FileServerURL
- LastUpdatedOn
- FilePath
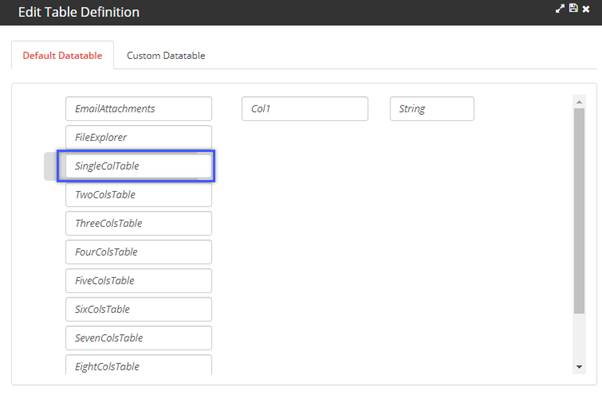
- SingleColTable:
- Col1
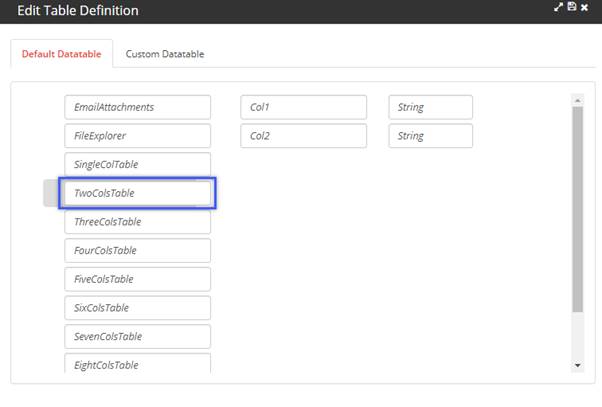
- TwoColTable:
- Col1
- Col2
- TwoColTable:
- Col1
- Col2
- Col3
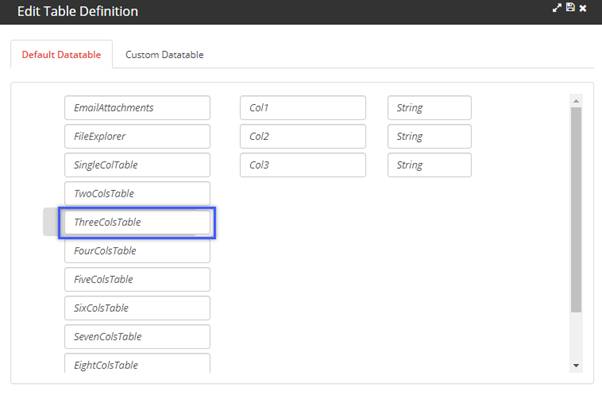
Note: Similarly, select the FourColsTable, FiveColsTable and so on up to TenColsTable can be selected. - 2.1.2. How to Use a Default Datatable:
- Click on the Table Def button on the right-hand side of the Task Design window.

- In the Edit Table Definition window that opens, choose Default Datatable.
- Click on the type of the table.
- Click on the Save button.
- 2.2 Custom Datatable: The user can create a datatable according to the requirements of the task.
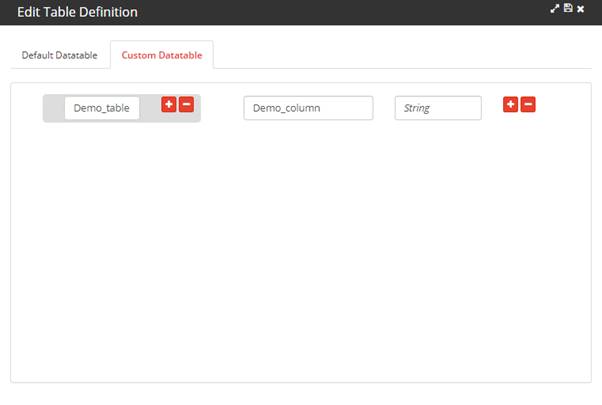
- 2.2.1. Creating a Custom Datatable:
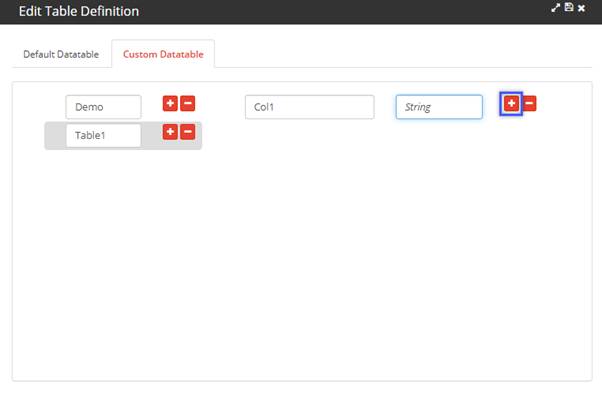
- Click on the Table Def button on the right-hand side of the Task Design window.
- In the Edit Table Definition window that opens, choose Custom Datatable.
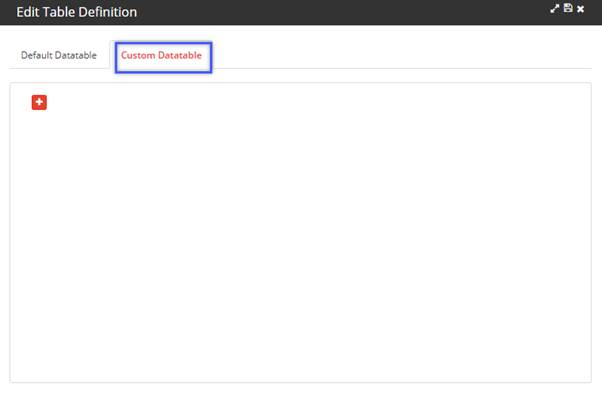
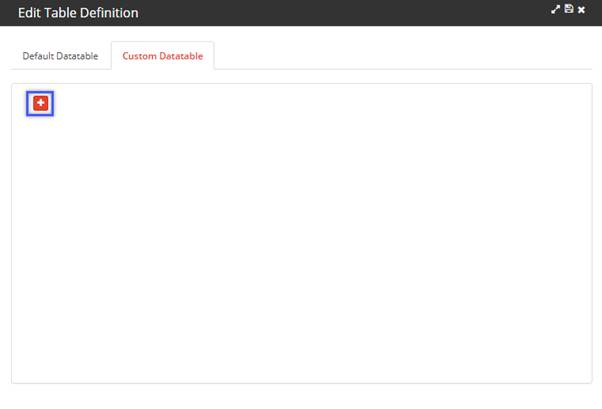
- Click on the + button to add a new datatable.
- Type the name of the datatable to be created. A default name “Table1” appears in the highlighted field, which the user can change according to the requirements.

- Click on the + button to add the columns in the table.

- Type the name of the columns to be created. A default name “Col1” appears in the highlighted field, which the user can change according to the requirements.
Note: The datatype of the column is set to String by default, which cannot be changed by the user.
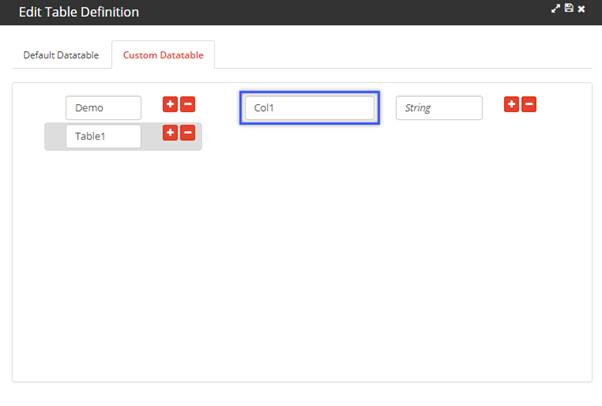
- Continue to add more columns by clicking the + button beside the String field.
- To add a new table, click on the + icon beside the Table1 field.
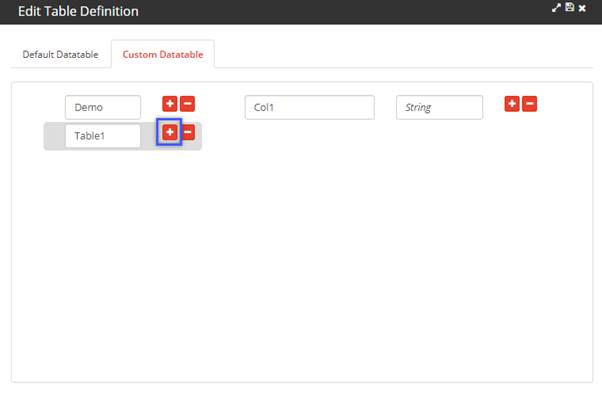
- Similarly, a table or a column can be deleted by clicking the - button beside their respective field.

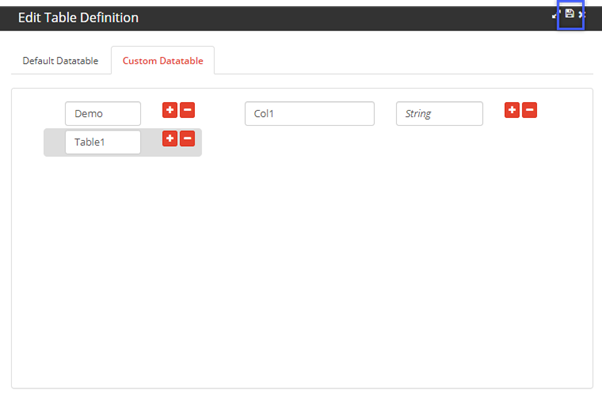
- Click on the Save button.
Note:
- To use a Datatable without using the DataTable node, define the table in the Table Def section and use the corresponding Default Expressions to perform various actions on the table.
- Default expressions that have the keyword “Table” in their names (For Ex: Get Table Value, Set Table Value, Search Value from table etc) can be used to perform various actions on the datatable. To find the expressions easily, type “Table” in the dropdown. Refer Expressions for more details.