XML
XML node is a data source node used when the input to a task is an XML file. It works mostly like CSV Node. The XML Data node expects the source file to be under the root element.
- Designing a Task Using an XML Node:
Do the following to use an XML node in a task:
- Use an existing task or create a new task based on the requirement.
Note: Refer Create A Task for more details on how to create a task and how to open an existing task. - Drag and drop the XML node from the Objects -> Data Sources section and connect the nodes.

- Click on the XML node and specify the properties:
- Name: Name of the node. A default name is displayed in this field, which the user can edit according to the task and the intent of using the node.
- Description: A short note on the purpose of the node.
- Mark run Failure on Node Fail: When the Mark run Failure on Node Fail field is ON, if the node execution fails then the complete task execution is marked as fail.
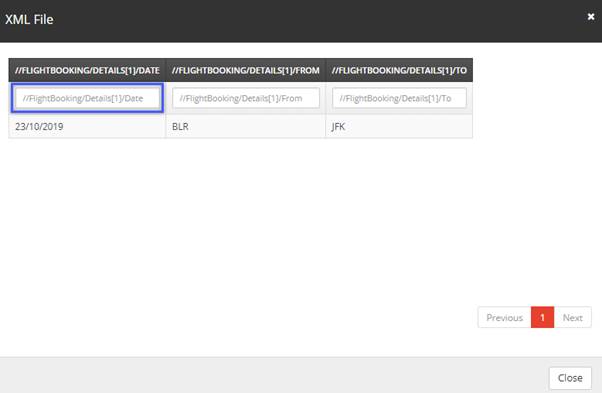
- XML: Name of the XML file to choose from the selected source in the Read XML From:. Click the eye symbol in the XML field to show the XML data in the selected file. It is possible to filter the data in the XML file by typing the filters in the column headers.
Refer Adding an XML file to Jiffy’s Repository section for more details. - Remove blank attributes: When this is turned ON, it removes all the blank attributes in the selected XML file.
- Iterate on this node’s output?: When this is turned ON, the task will iterate on the XML node’s output.
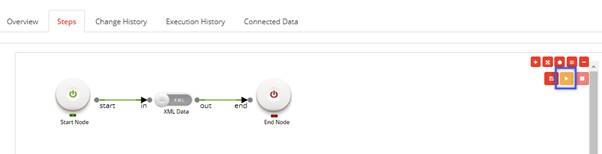
- Click on the Trial Run icon to run the task.

- Click on the Book icon above the XML Data node to display the Result of execution window of the XML Data node.
- Use an existing task or create a new task based on the requirement.
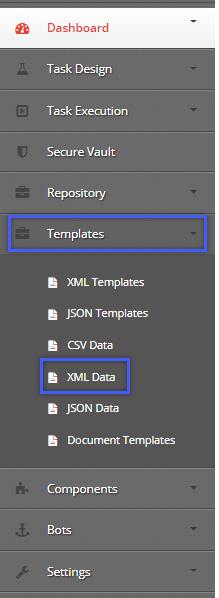
- Adding an XML file to Jiffy’s Repository:
- Log in to Jiffy.
- Navigate to the Templates section on the left-hand side.
- Select the XML Data option.

- Click on the +Add XML File button.
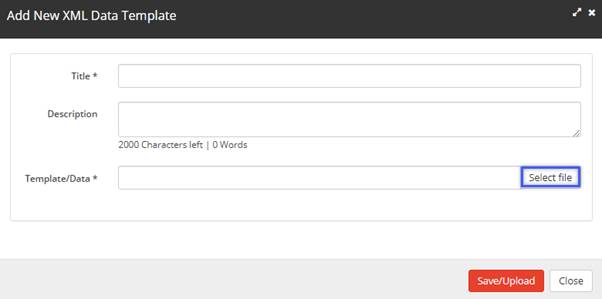
- Type the details and click on the Select file button to upload the file.
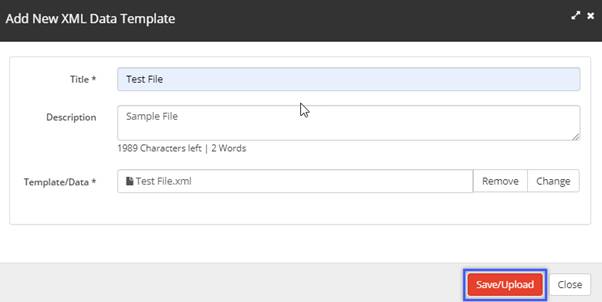
- Click on the Save/Upload button to save the file.
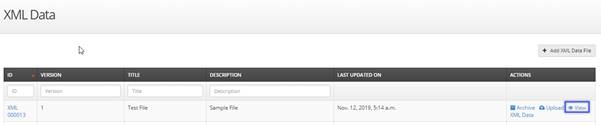
- To view the file, click on the View XML button.
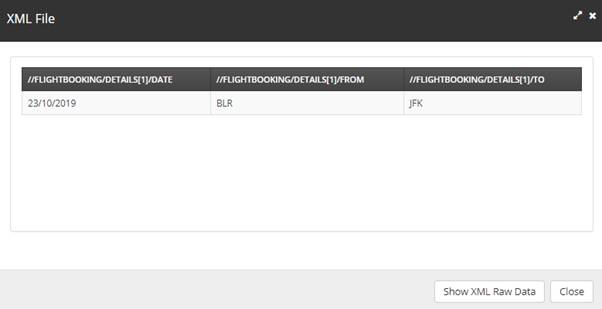
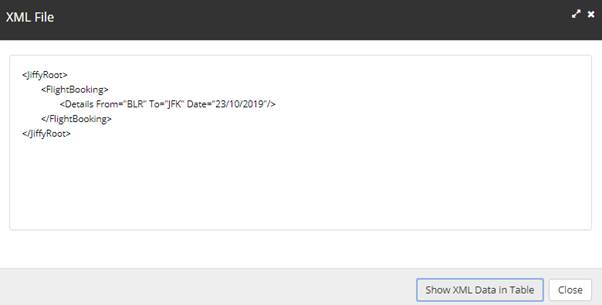
- Click on the Show XML Raw Data button in the XML File window to view Raw data..
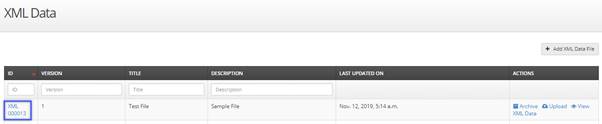
- Similarly, the user can Archive and Upload the XML file by clicking the respective buttons.
- Open the XML file by clicking on the ID of the respective XML file.
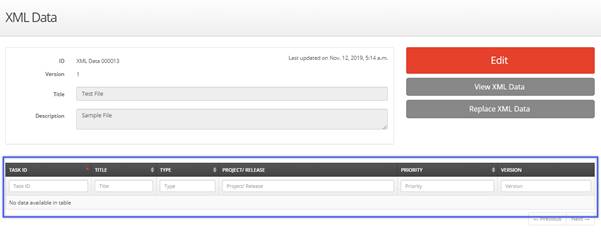
- The details of all the tasks that use this XML file are displayed here.

- Click on the Edit button to edit the Title and the Description of the XML file.
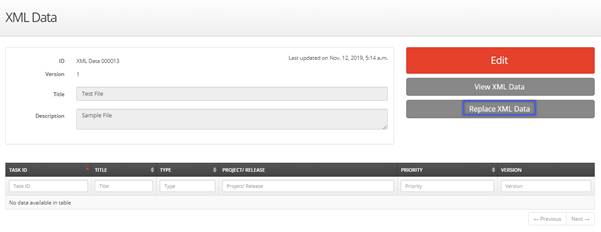
- Click on the Replace XML File button to upload a new XML file.
Note: When a file is modified, all the tasks that use this file will automatically get the modified file for the task execution.