Sterling API
Sterling API Node is used to trigger the out of the box sterling APIs.
- Pre-condition:
Before using a Sterling API node in designing any task, the Sterling configuration must be defined.
1.1 Defining the Sterling Configuration:
Do the following to define the Sterling configuration:- Login to Jiffy.
- Navigate to Task Design -> Configurations -> Sterling Configuration.
- Click on the Add button to define the configuration.

The following dropdown is displayed with two options:

- Create New: Use this option to create a new Sterling configuration.
Do the following to add new configuration:- Click on the Create New button to display the display the Add Sterling Configuration window.
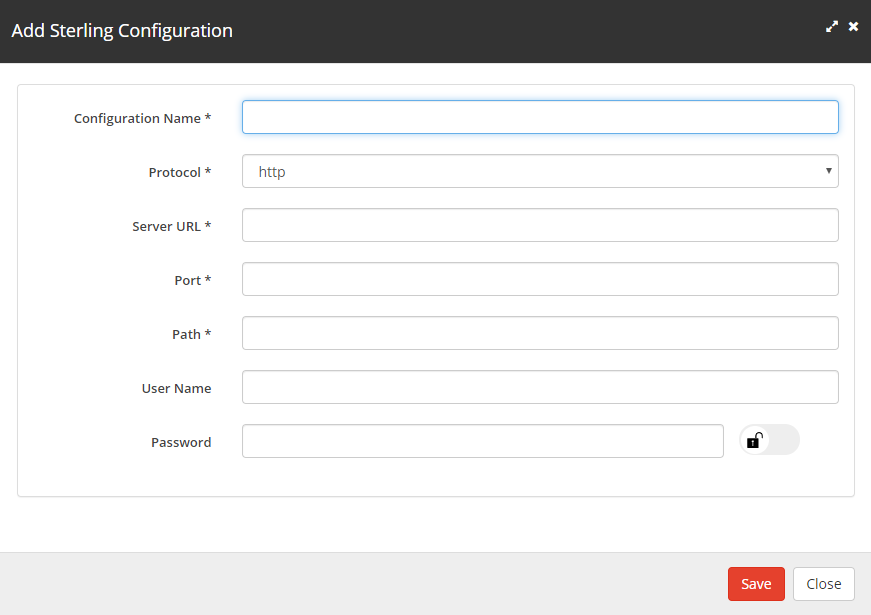
Specify the details for the following fields:- Configuration Name: Name to be provided for the configuration and the specified name is used in the Properties section of the node.
- Protocol: Select the required protocol (HTTP or HTTPS) from this drop-down.
- Server URL: Type the required server URL.
- Port: Type the required port. Make sure that the port [7999] provided in the Sterling SOAP configuration is Open. Contact DEVOPS to open the port.
Note: If the port is closed, then during execution it throws an error message “Connect to gate.option3consulting.com:7999 [gate.option3consulting.com/106.51.80.210] failed: Connection refused” - Path: Type the required path.
- Username: Admin
- Password: password. The password can be normal/secure vault/Cyber ark.
- Click on the Save button.
- Click on the Create New button to display the display the Add Sterling Configuration window.
- Copy Existing: Use this option to copy from the existing configurations that are defined earlier.
- Click on the Copy Existing button to display the Copy Configuration window.

- Type the details of the required configuration in the above Search fields.
- Select the required configuration from the filtered list.
- Click on the Copy button.
- Click on the Copy Existing button to display the Copy Configuration window.
- Create New: Use this option to create a new Sterling configuration.
- Designing a Task Using a Sterling API Node:
Do the following to use an Sterling API node in a task:
- Use an existing task or create a new task based on the requirement.
Note: Refer Create A Task for more details on how to create a task and how to open an existing task. - Drag and drop the Sterling API node from the Objects -> Sterling Components section and connect the nodes.
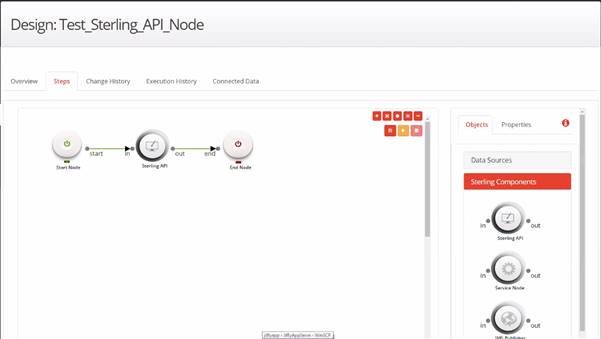
- Click on the Sterling API node and specify the properties:
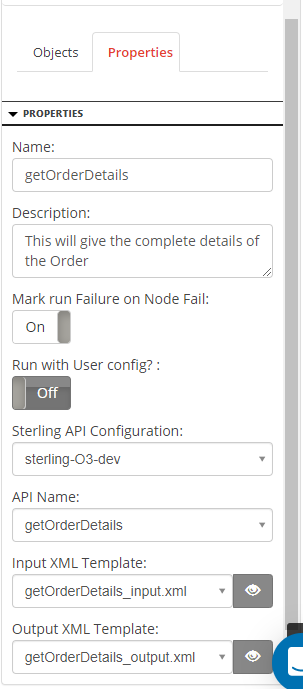
- Name: Name of the node. A default name is displayed in this field, which the user can edit according to the task and the intent of using the node.
- Description: A short note on the purpose of the node.
- Mark run Failure on Node Fail: When the Mark run Failure on Node Fail field is ON, if the node execution fails then the complete task execution is marked as fail.
- Run with User config?: This is used to run the node if any user-level configuration is defined for
- Sterling API Configuration: The configuration of the release/environment level where you want to run the task case. The task will get the release level configuration from the design run and the environment level configuration from the execution run. For more details on how to add a configuration, click here.
- API Name: Name of the Sterling in-built API to choose from the list of APIs available
- Input XML Template: The input XML template for the API.
- Output XML Template: The output XML template for the API.
- Click on the Mapping between the Start node and the Sterling API node.
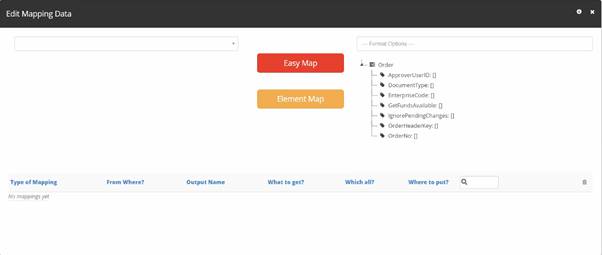
- To remove the Empty Node and Attributes, click on the “Format Options” drop-down and select the desired values.
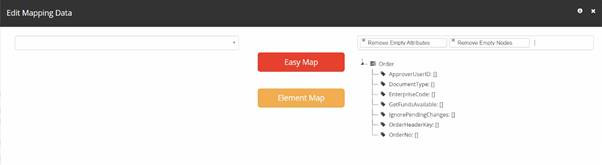
- Map the required attribute values present in the input XML template from any one or multiple sources from the following:
- CSV file
- Output of Sterling API / Service Node used in the task previously.
- XML Template
- Constant Mapping
This example shows Constant mapping as shown below:
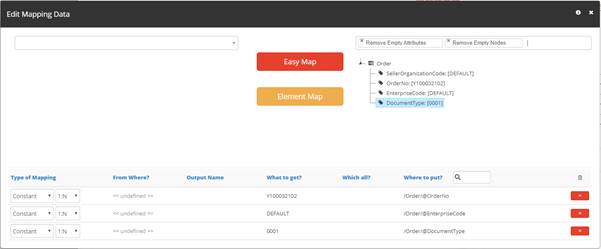
- To remove the Empty Node and Attributes, click on the “Format Options” drop-down and select the desired values.
- Click on the Trial Run icon to run the task.
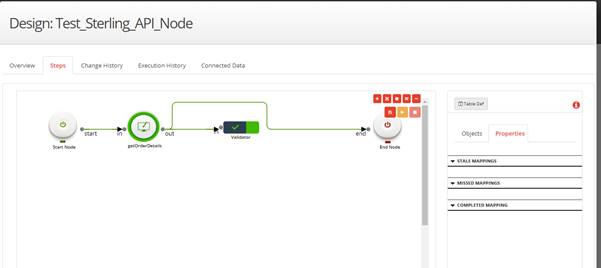
- Click on the Book icon above the getOrderDetails node to display the Result of execution window of the Sterling API node.
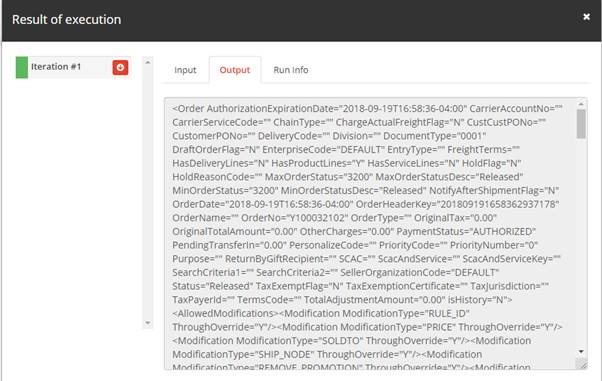
- Use an existing task or create a new task based on the requirement.