Excel
Excel node is used to access an excel sheet and perform different actions in excel sheets using Jiffy. Any excel sheet can be accessed and automated directly using Excel node.
Excel node does not require familiarization.
To use an excel node, ensure that Microsoft excel(Licensed) is installed in the machine.
- Pre-condition:
Before using a Excel node in designing any task, the Excel configuration must be defined.
1.1 Defining Excel Configuration:
Do the following to define the Excel configuration:- Login to Jiffy.
- Navigate to Task Design -> Configurations -> Excel Configuration.
- Click on the Add button to define the configuration.
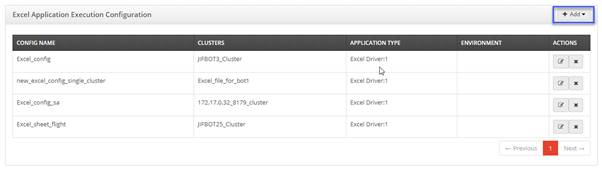
The following drop-down is displayed with two options:

- Create New: Use this option to create a new Excel configuration.
Do the following to add new configuration:- Click on the Create New button to display the display the Add Excel Configuration window.
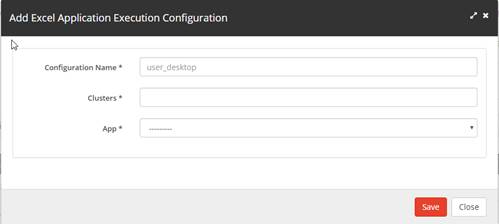
Specify the details for the following fields:- Configuration Name: Name to be provided for the configuration and the specified name is used in the Properties section of the node.
- Clusters: Select the required cluster from this drop-down.
- App: Select the excel related application from this drop-down. The excel:1 application can be used as a default application.
- Click on the Create New button to display the display the Add Excel Configuration window.
- Copy Existing: Use this option to copy from the existing configurations that are defined earlier.
- Click on the Copy Existing button to display the Copy Configuration window.
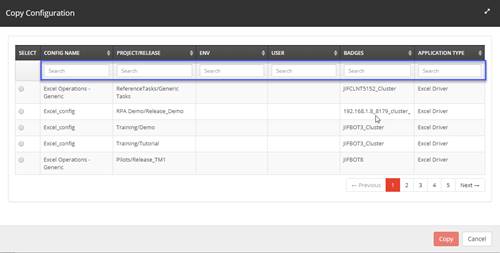
- Type the details of the required configuration in the above Search fields.
- Select the required configuration from the filtered list.
- Click on the Copy button.
- Click on the Copy Existing button to display the Copy Configuration window.
- Create New: Use this option to create a new Excel configuration.
- Designing a Task Using an Excel Node:
Do the following to use an Excel node in a task:
- Use an existing task or create a new task based on the requirement.
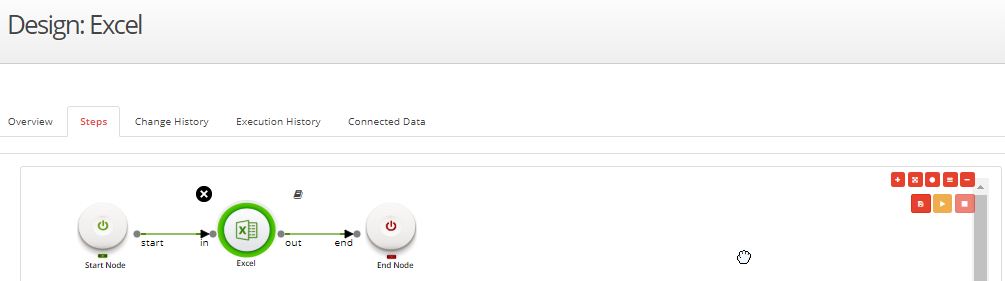
Note: Refer Create A Task for more details on how to create a task and how to open an existing task. - Drag and drop the Excel node from the Objects -> UI section and connect the nodes.
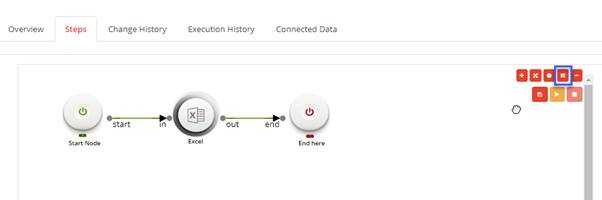
- Click on the Excel node and specify the properties:
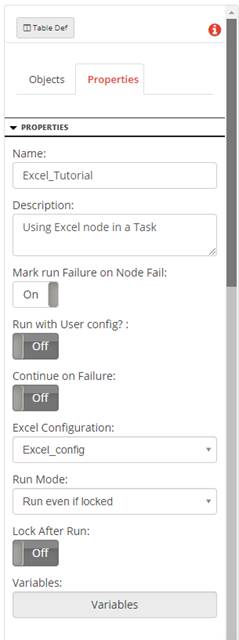
Add the following details:- Name: Name of the node. A default name is displayed in this field, which the user can edit according to the task and the intent of using the node.
- Description: A short note on the purpose of the node.
- Mark run Failure on Node Fail: When the Mark run Failure on Node Fail field is ON, if the node execution fails then the complete task execution is marked as fail.
- Run with User Config?: This functionality is now currently deprecated.
- Continue on Failure: When the Continue on Failure field is ON, even if the node fails, the execution will continue to the next node. When the Continue on Failure field is OFF, if the node fails, the execution will not continue to the next node.
- Excel Configuration: Select the required configuration from the Excel Configuration drop-down. For more details click here.
- Run Mode: The user can select any one of the following options from the Run Mode drop-down:
- Run if locked: The task runs even if the machine is locked.
- Unlock and run: Unlocks the machine and runs the task.
- Lock After Run: Locks the machine after the node execution.
- Variables: Click on the Variables button to select the input variables and to create an output variable.
- To create an output variable, go to Output Variables tab.
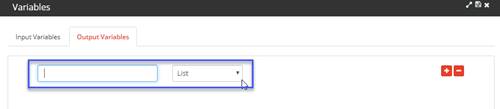
- Type the required name of the output variable in the first text box and then select the type of the output variable from the drop-down. The output variable type can be either List or Table. Note:If the Table option is selected, define the table structure by clicking on the Table Def button on the right-hand side of the screen. For more details, click here.
- To create an output variable, go to Output Variables tab.
- Double click on the Excel node to display the Edit UI dialogue box.
- The Edit UI dialogue is now displayed with default Excel Cmd option in the first drop-down. This drop-down allows the user to select any of the following options:
- Excel Cmd
- Run Macro
- Custom Excel Cmd
- Set Variable
- Default Expr
- Custom Expr
Note: The expressions must be written in IronPython script.
- Using the Excel Cmd functionality, the user can perform various actions on the Excel sheet.

- Select the excel commands from the drop-down present next to the Excel Cmd field. For more details on the excel commands, click here
- Click on the Save button.
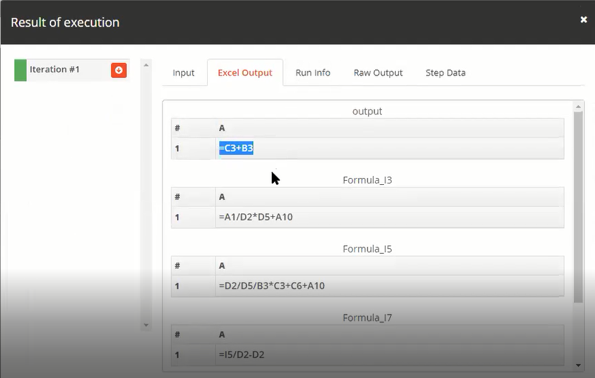
- Click on the Trail Run icon.
- Select the Excel node and click on the Book icon to view the Result of execution screen.
Excel Macros
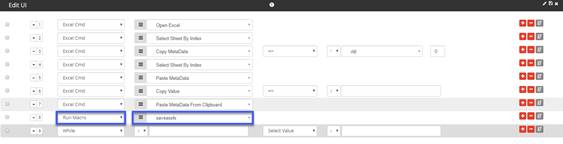
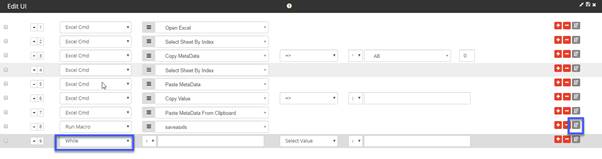
There is an additional feature in Excel node where the excel macros can be created and saved in repository and can be used while doing the scripting for excel node in task design.- In the Edit UI dialog, select the Run Macro commandand select the required excel macro (the list box displays the excel macros that are present in the Repository -> Excel Macros).
Click here for more details on adding an Excel Macro to repository.
- In order to use macros, the excel sheet used must be macro enabled with file extension .xlsm
- Excel must be configured to accept VBA macros execution. Select the below higlighted options in the File-> Option->Trust Center ->Macro Settings screen.

Adding an Excel Macro to the Repository:- Log in to Jiffy.
- Click on the Repository drop-down on the left-hand side of the screen.
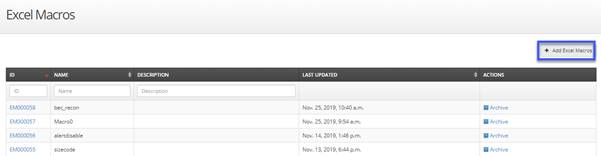
- Click on the Excel Macros option.
- Click on the Add Excel Macros button.
- Specify the following details:

- Name
- Description
- Module Name
- Function Name
- Click on the Save button.
- Click on the Edit button.
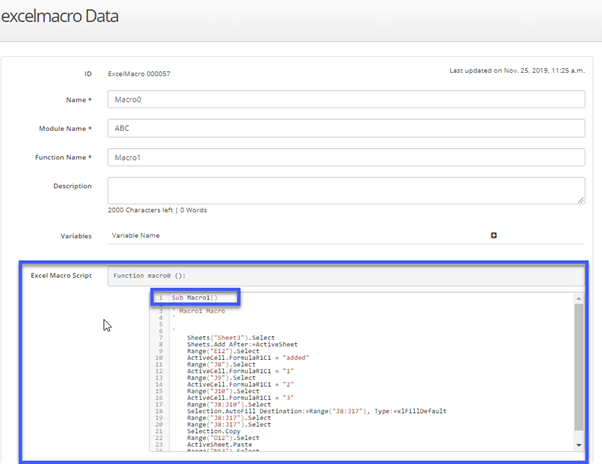
- Copy the code of the macro from the excel sheet (Excel file -> Developer -> Macros -> Edit button) and paste the code into the Excel Macro Script field.
Note: Make sure that the Function Name is same as the code following the “Sub” code line as highlighted below. If it is not same, edit the Function Name.
- Use an existing task or create a new task based on the requirement.