Expression
There are two types of expressions in Jiffy:
- Default Expressions: These are Jiffy provided python expressions for the commonly used functions.
For example: Concat, Capitalize, Add days etc. - Custom Expressions: Jiffy allows the users to create custom Python expressions and use them in the UI nodes steps.
A Custom Expression needs to be added to Jiffy Custom Expressions Repository. Once it is uploaded, it will be available in the drop-down of Custom Expressions in the Edit UI dialog of the respective nodes (All UI nodes).
- Designing a Task Using an Expression Node:
Do the following to use an Expression node in a task:
- Use an existing task or create a new task based on the requirement.
Note: Refer Create A Task for more details on how to create a task and how to open an existing task. - Drag and drop the Expression node from the Objects -> UI section and connect the nodes.
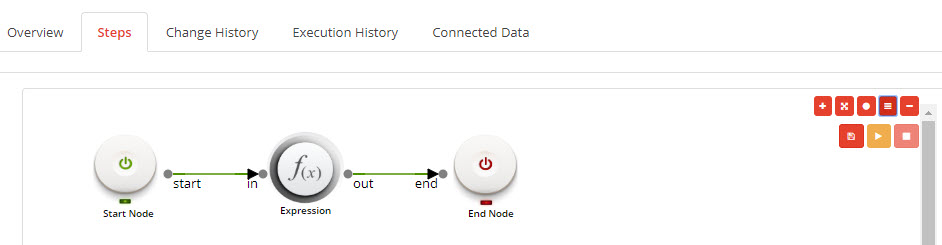
- Click on the Expression node and specify the properties:

Add the following details:- Name: Name of the node. A default name is displayed in this field, which the user can edit according to the task and the intent of using the node.
- Description: A short note on the purpose of the node.
- Mark run Failure on Node Fail: When the Mark run Failure on Node Fail field is ON, if the node execution fails then the complete task execution is marked as fail.
- Continue on Failure: When the Continue on Failure field is ON, even if the node fails, the execution will continue to the next node. When the Continue on Failure field is OFF, if the node fails, the execution will not continue to the next node.
- Clusters: : User can add cluster/s in this field, under which the required machine/group of machines is present with the necessary data.
- Run Mode: The user can select any one of the following options from the Run Mode drop-down:
- Run if locked: The task runs even if the machine is locked.
- Unlock and run: Unlocks the machine and runs the task.
- Lock After Run: Locks the machine after the node execution.
- Variables: Click on the Variables button to select the input variables and to create an output variable to assign the output of the UI event values.
- To create an output variable, go to Output Variables tab.
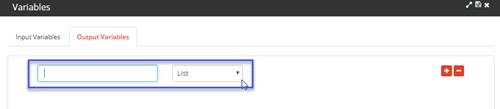
- Type the required name of the output variable in the first text box and then select the type of the output variable from the drop-down. The output variable type can be either List or Table.
Note:If the Table option is selected, define the table structure by clicking on the Table Def button on the right-hand side of the screen. For more details, click here.
- To create an output variable, go to Output Variables tab.
- Double click on the Expression node to display the Edit UI dialogue box.
- Select the Custom Expression or the Default Expression option based on the requirement.

- If the user wants to access the available Jiffy expressions, select the Default Expression option, select any one of the options (pre-defined expressions based on the requirement). For example, assume “Upload To Server” option is selected.
- Click on the following highlighted button beside the Upload To Server field and type or paste the file path.

Note:In the provided file path, each folder must be separated by double slash (\), and the complete file name must be provided. View the file properties to display the complete file name (includes file type, for example, .pdf, xlsx, etc.,)
Example: C:\My Drive\Demo.xlsx - Select the output variable that is created while specifying properties.

- If the user wants to access the the custom expressions that are stored in repository, select the Custom Expression option, select any one of the options (all the custom expressions that are created are available in this drop-down).
Note: The expressions must be written in IronPython script to be processed by Expression node.
For example, assume “Delete File” option is selected. - Click on the following highlighted button beside the Upload To Server field and type or paste the file path.

- Click on the Save button.
- Click on the Save button in the Edit UI dialog after designing all the steps.
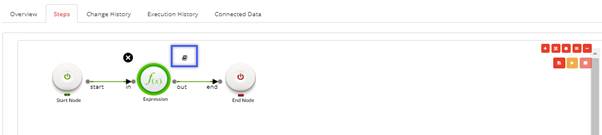
- Click on the Trail Run icon.
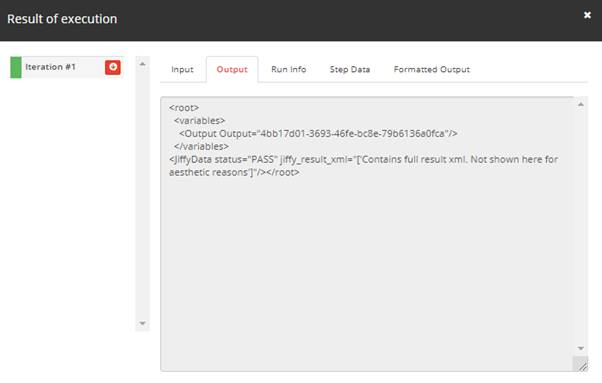
- Select the Expression node and click on the Book icon to view the Result of execution screen.
- Use an existing task or create a new task based on the requirement.