2. How to Create a Key and Value Pair Under Secure Vault
Do the following to create a secure key and value pair in secure vault:
- Login to Jiffy.
- Click on the Secure Vault option.
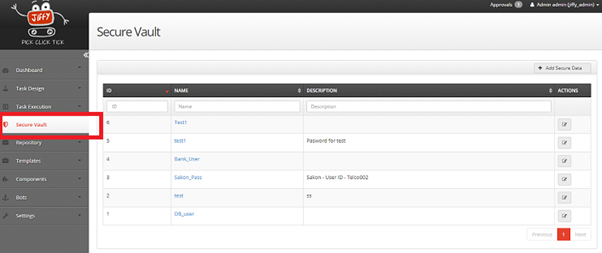
- Click on the Add Secure Data button to create a Secure Key.

-
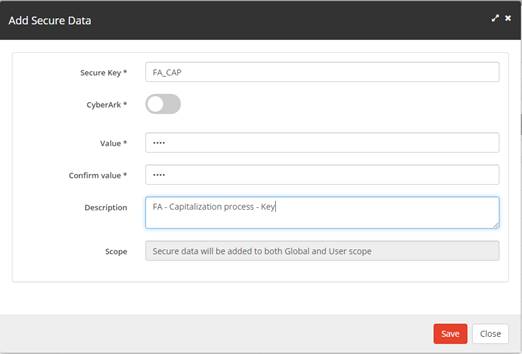
Add the following details:
- Secure Key*: Type the name of the Secure key that is being created. It can be related to the application that the user is are creating secure key for or even be a generic one – depending on the requirement.
Example: Key_FA_CAP – refers to a key created for the FA – Capitalisation process flow - CyberArk: If the CyberArk settings are enabled for this environment, the user must select the CyberArk radio button and provide the CyberArk key as the value.
- Value*: Enter a secure password for this key.
- Confirm Value*: Type the secure password again that is provided in the Value field.
- Description: This field allows the user to give a short description for the key that is being created.
- Scope: Gives the information on the level at which the value would be stored
- Secure Key*: Type the name of the Secure key that is being created. It can be related to the application that the user is are creating secure key for or even be a generic one – depending on the requirement.
- Click the Save button to complete the activity
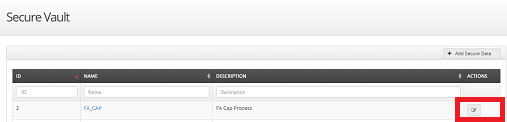
Note: The created Key is by default at both the GLOBAL level and USER scope level. By USER level, it is referring to the user who has created the key. - The scope level can be changed to the USER level or GLOBAL by selecting the Edit button (pencil icon) in the Actions column.
The Edit Secure Data screen is now displayed.
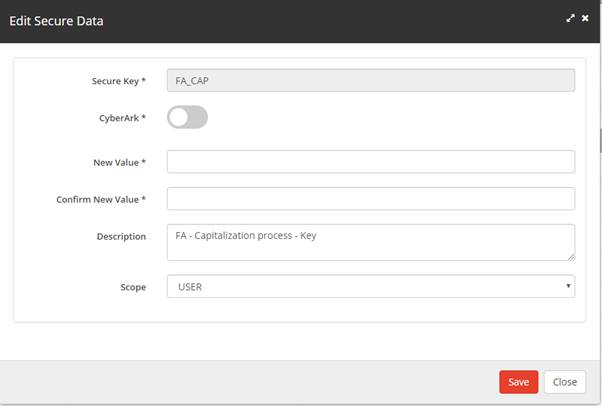
- Select the USER option or GLOBAL option from the Scope list box based on the requirement.
- Click on the Save button to save the changes.