5. UI
In Jiffy, UI nodes allow the user to automate UI screens of any other application. For example, Web pages, Mainframe, SAP, Desktop based applications and on. Here the automation is a two-phase approach, first, the UI pages need to be familiarized using Jiffy UI Learn App and then scripting needs to be done in tasks using corresponding UI nodes.

Web UI Node
Web UI node is used to automate web applications. Click here for more information on the Web UI node.
Desktop UI
Desktop UI node is used to automate the user interface of any desktop application. Click here for more information on the Desktop UI node.
Mainframe UI
To automate the screens of mainframe application. Click here for more information on the Mainframe UI node.
SAP UI
To automate screens of SAP application. Click here for more information on the SAP UI node.
Java UI
To automate Java applications. Click here for more information on the Java UI node.
Excel
Excel node is used to access an excel sheet and perform different actions in excel sheets using Jiffy. Any excel sheet can be accessed and automated directly using Excel node. Click here for more information on the Excel node.
Expression
There are two types of expressions in Jiffy:
- Default Expressions: These are Jiffy provided python expressions for the commonly used functions.
For example: Concat, Capitalize, Add days etc. - Custom Expressions: Jiffy allows the users to create custom Python expressions and use them in the UI nodes steps.
A Custom Expression needs to be added to Jiffy Custom Expressions Repository. Once it is uploaded, it will be available in the drop-down of Custom Expressions in the Edit UI dialog of the respective nodes (All UI nodes). Expression node is used to utilize these expressions in a task. Click here for more information on the Expression node.
Login & Logoff Node
Login node and log off node are the UI nodes which are used to login to the machine automatically, start the jiffy service on the machine provided on the node and log off from the machine respectively. Click here for more information on the Login & Logoff nodes.Some common features for all UI nodes:
Lock and Unlock
All the UI nodes have an option called Run mode. Select any UI node to view the Run mode drop-down in the Properties section of the Task Design screen.
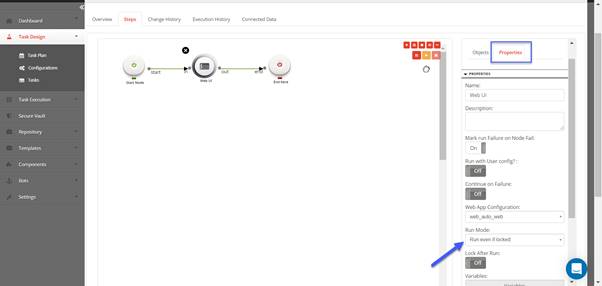
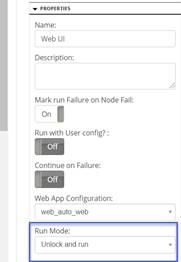
The Lock and Unlock feature helps the user to configure the UI nodes in two Run mode options:- Unlock and Run: If the machine is locked and valid Usernameand Password are provided in the machine details, the machine will be unlocked before the node execution.
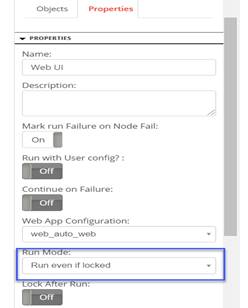
- Run Even if locked: If the machine is locked, during the execution it will NOT be unlocked and the task execution will happen in the background.
Common options in UI Steps:
The user can use the following actions in the UI steps of all the UI nodes.- Set Variable: There is an option to set a variable inside the UI node. The value to be set can either be a constant or another variable. If this variable is set as an output variable in the Properties tab, it can be made available for other nodes as well.
- Default Expressions: These are Jiffy provided python expressions for the commonly used functions. For example: Concat, Capitalize, Add days etc.
- Custom Expressions: Jiffy provides a feature to allow users to create custom Python expressions and use them in the UI nodes steps. The Custom Expressions need to be uploaded to Jiffy Repository (Repository -> Custom Expressions:). Once it is uploaded, it is available in the drop down of Custom Expressions option.
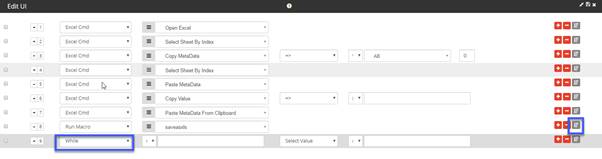
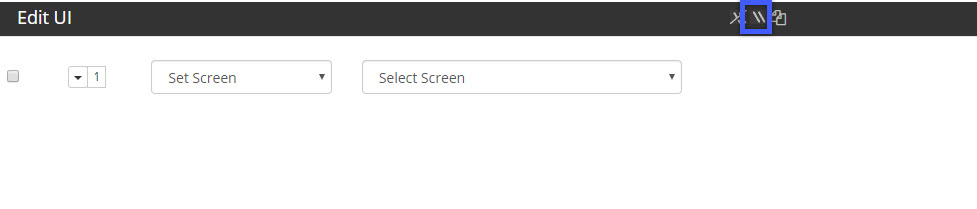
- While OR IF: User can use While loop / IF condition inside the UI node. Click on the following highlighted button at right corner of the Edit UI dialog to select While/IF option.
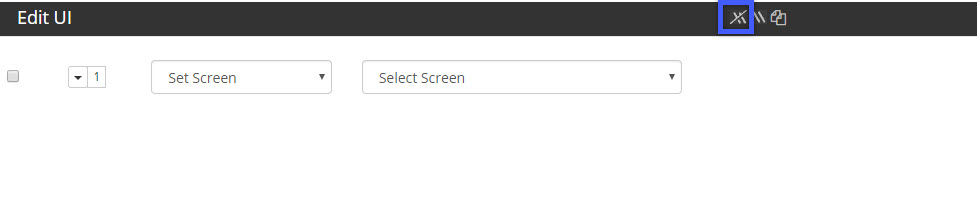
- Bulk Comment/Uncomment: User can select multiple steps
to comment or uncomment at once.
- Select the required steps and then click on the following
highlighted icon to comment.
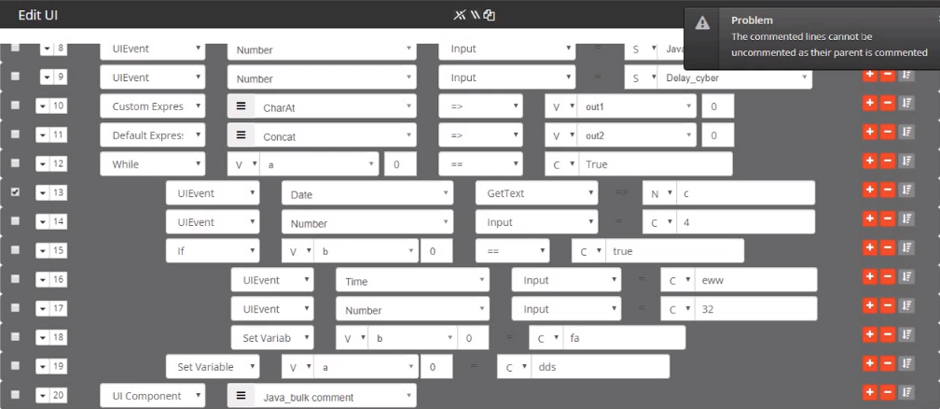
- Select the required steps and then click on the highlighted icon to uncomment.
Note: When the starting step of a loop (for example, while) is commented and when the user tries to uncomment a step within that loop then the following error message will be displayed.
“The commented lines cannot be uncommented as their parent is commented.”
- Unlock and Run: If the machine is locked and valid Usernameand Password are provided in the machine details, the machine will be unlocked before the node execution.