1. Add Task
How to Create a Basic Task:
The following are the basic steps to be followed to create a Task in Jiffy.
Note: The following task is created as an example using a CSV Node to explain the steps to create a task. Similar steps can be followed to create a task using any other node.
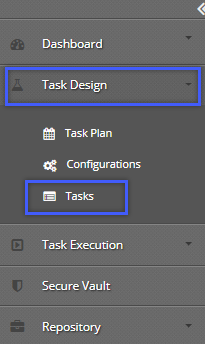
- Navigate to the Task Design section on the left-hand side.
- Select the Tasks field.
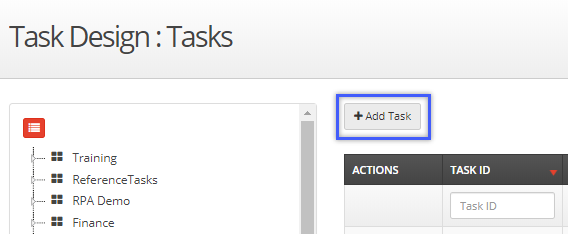
- Select the required Project and Release.

- Click on the +Add Task button to create a new task.
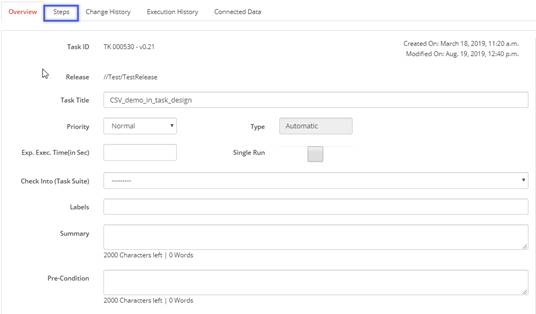
- Type the name of the task in the Task Title text box and click on the Save button to save the task.

- Click on the Steps tab to display the Task Design window.
- Drag and drop the required node icon from their respective sections from the right-side of the screen in the Objects tab.
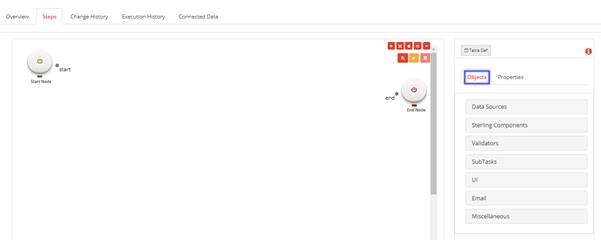
For Ex: To use CSV node, drag and drop the CSV node icon from the Data Sources section on the right-side of the screen in the Objects tab.

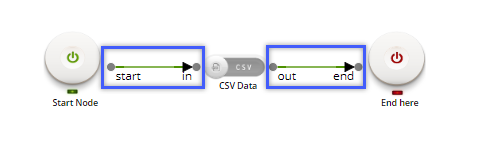
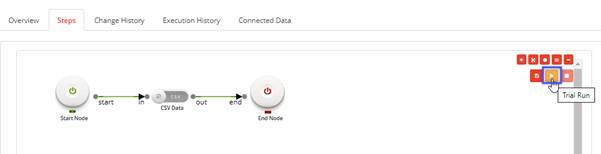
- Connect the nodes by clicking on the Start point of the Start Node to In point of the CSV Data node and then from the Out point of the CSV Node to the End point of the End Node.
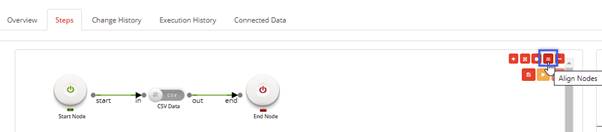
- Click on the Align Nodes icon on the right corner of the design canvas to align the nodes.
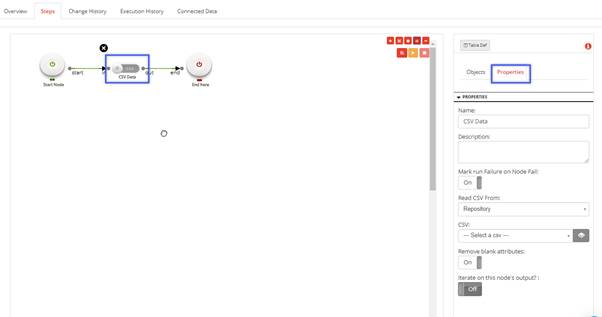
- Click on the CSV Data node and specify the properties of the node according to the task.
Note: The properties related information of each node is explained in Nodes section.
- Click on the Trial Run icon to run the task.
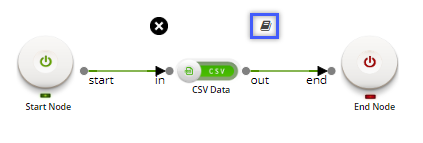
- Click on the CSV Data node and then on the Book icon to view the Input, Output and Run info in the Result of execution dialog box.

Opening an existing task:
Do the following to open an existing task:
- Login to Jiffy.
- Navigate to Task Design -> Tasks.
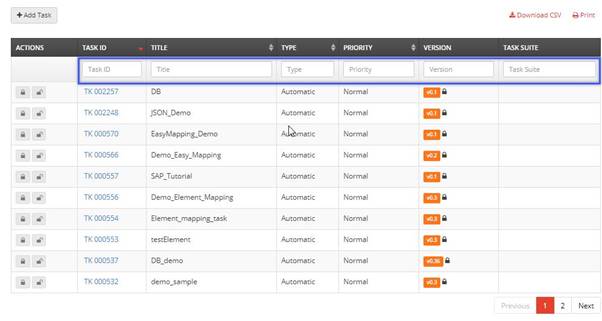
- Provide the details of the required task in the highlighted fields and then click on the respective task to open the task in the Task Design screen.
Adding REST API Parameters in the Start node:
Do the following to add parameters in the Start node in the Task Design screen.
- Double-click on the Start node to add parameters:
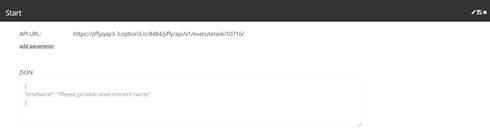
Note: A default URL is displayed in the API URL field. - Click on the add parameter field.
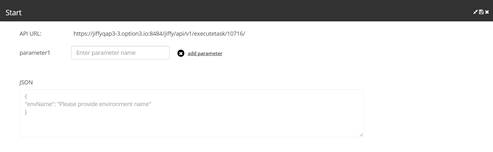
- Type the Parameter name in the Parameter1 text box. Provide the environment name in the JSON text box.
- To delete the parameter, click on the × icon. Note: The API URL and JSON code can be used to execute any task in external applications like Postman.
- Click on the Save button.
- Map the parameters of the Start node to the node following it.
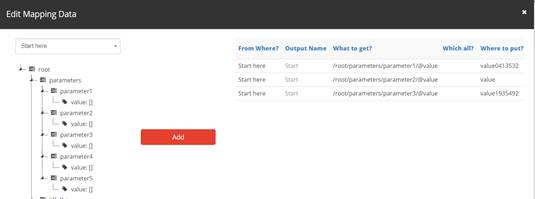
Note: For more details on mapping, click here.
- Click on the Run button.
- The Rest Parameters dialog box is displayed prompting the user
to provide the required parameters:

- In the Rest Parameters dialog box, the user can provide any
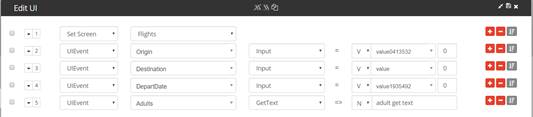
input parameters that are used in the task. The following screenshot
displays the input parameters like Origin, Destination, etc... that
are used in the task.
- These parameters can be provided in the Rest Parameters dialog box to execute the task.
- Click on the OK button to execute the task.
- Type Jiffy application credentials in the Authorization section of the Postman application.
- Provide the API URL.
- Copy and paste the JSON code from the Start node to the Body
section.
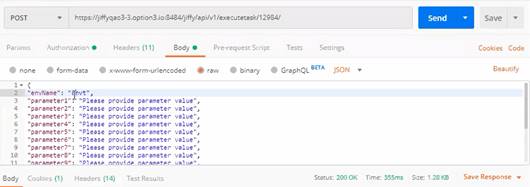
- Provide the environment name that is linked to the test case.
- Provide the parameters.
- Click on the Send button.
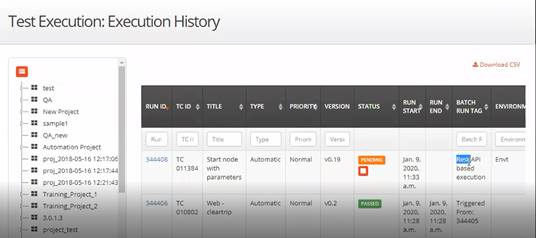
- The user can view the Run ID of the task in the Task Execution
-> Execution History screen.